Development Environment Setup
Steps to configuring the Development Environment Setup
-
Start a GitHub account as the first step with the official mail id, the steps for Create a new GitHub account: Navigate to the following page and do the step by step process
1.1. Create a new GitHub account: Navigate to the following page and do the step by step process given below Sign up to GitHub • GitHub
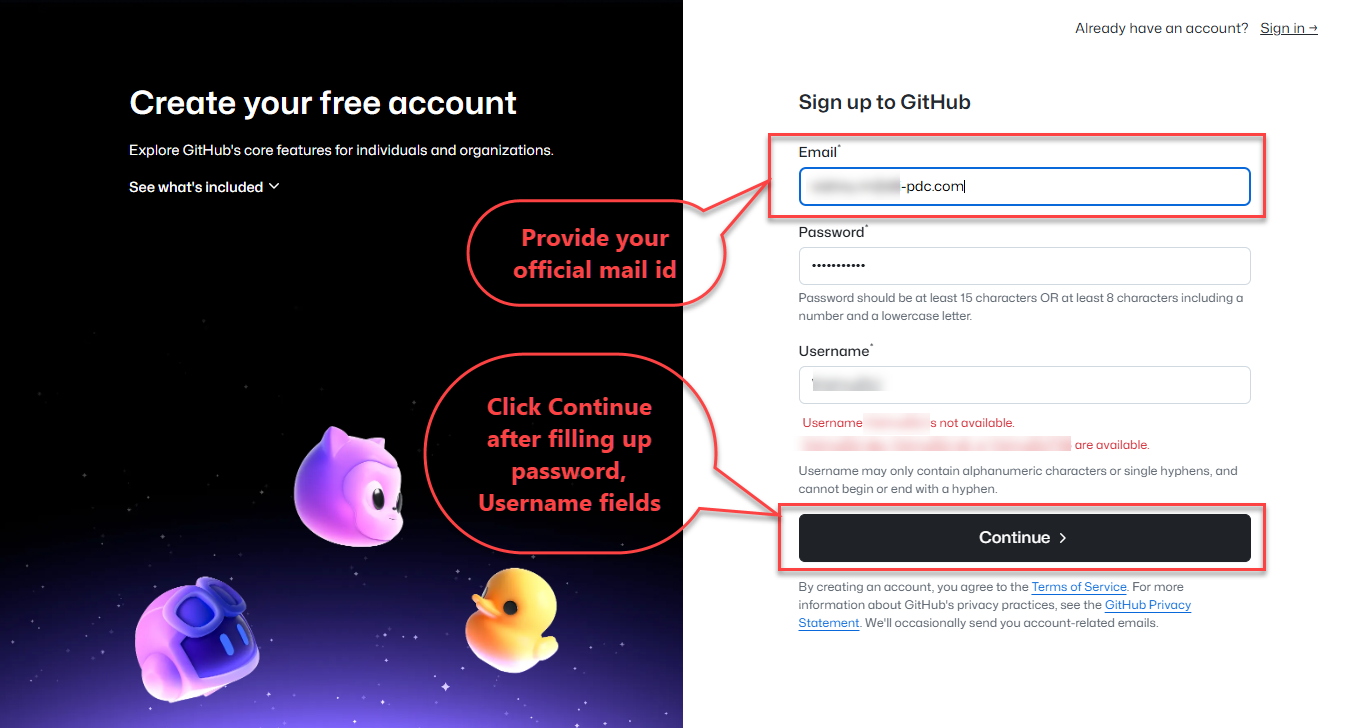
Note: Give the official mail id for creating new account
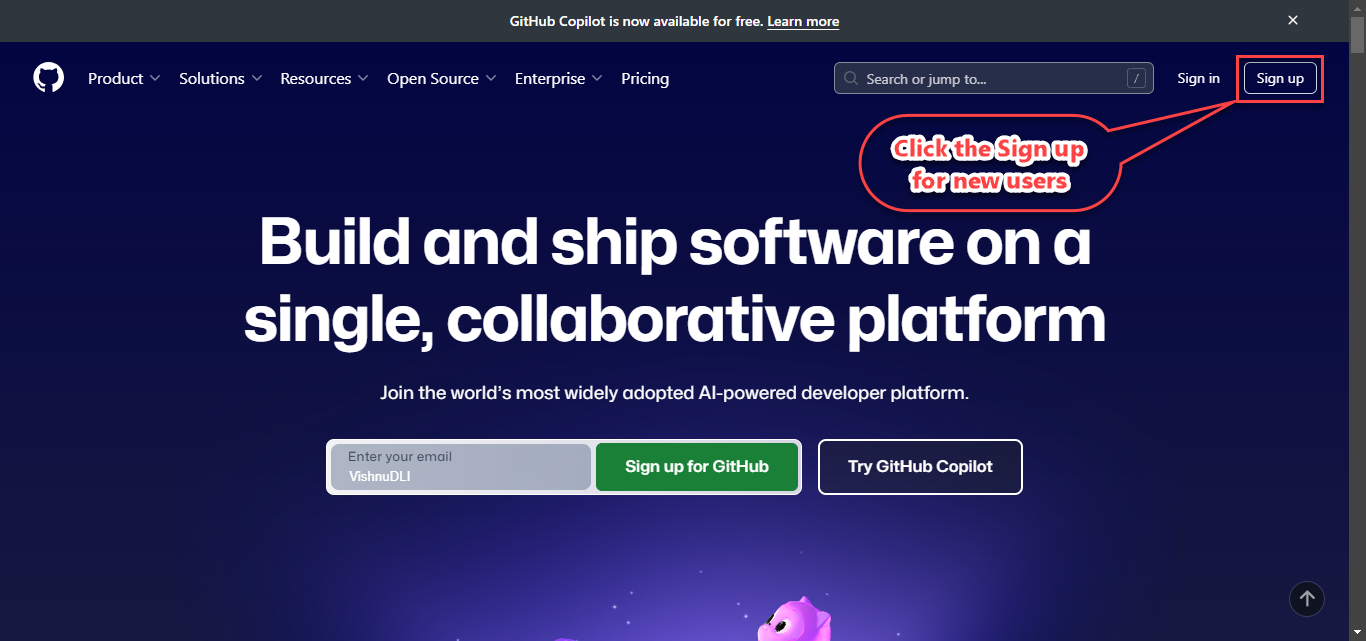
1.1.1. Click on Sign Up
1.1.2. Provide a username and password in the fields provided.
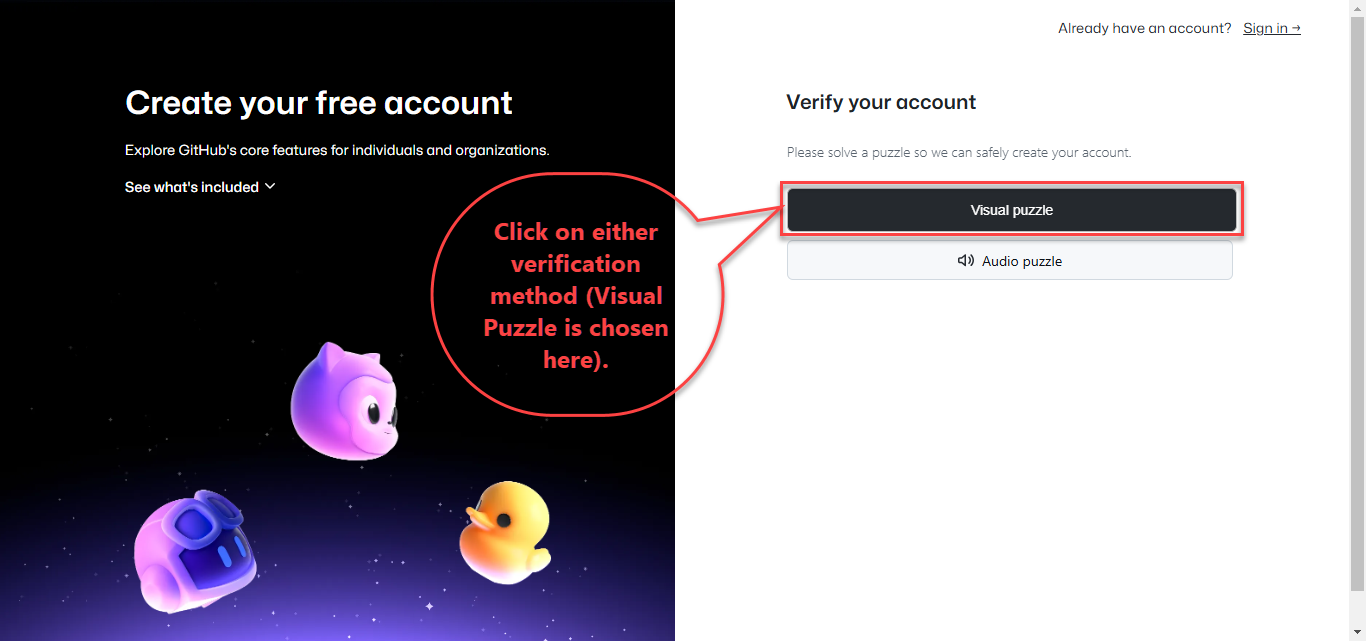
1.1.3. Complete the verification process

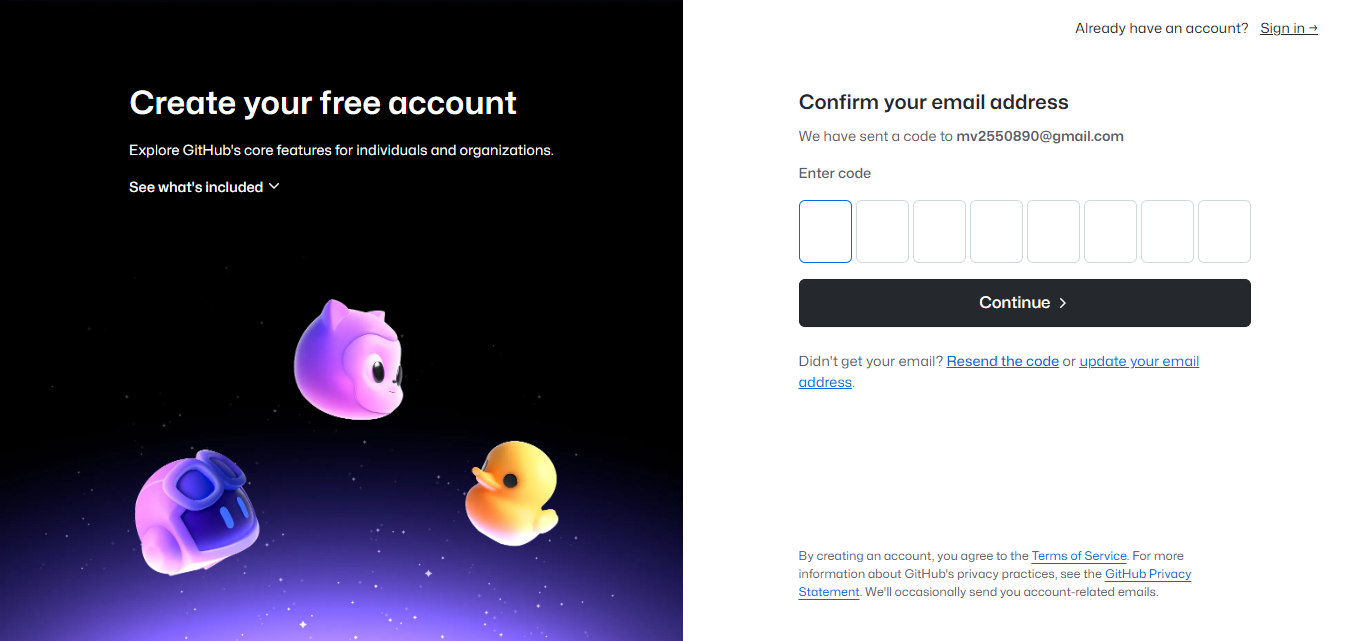
1.1.4. Complete the OTP verification
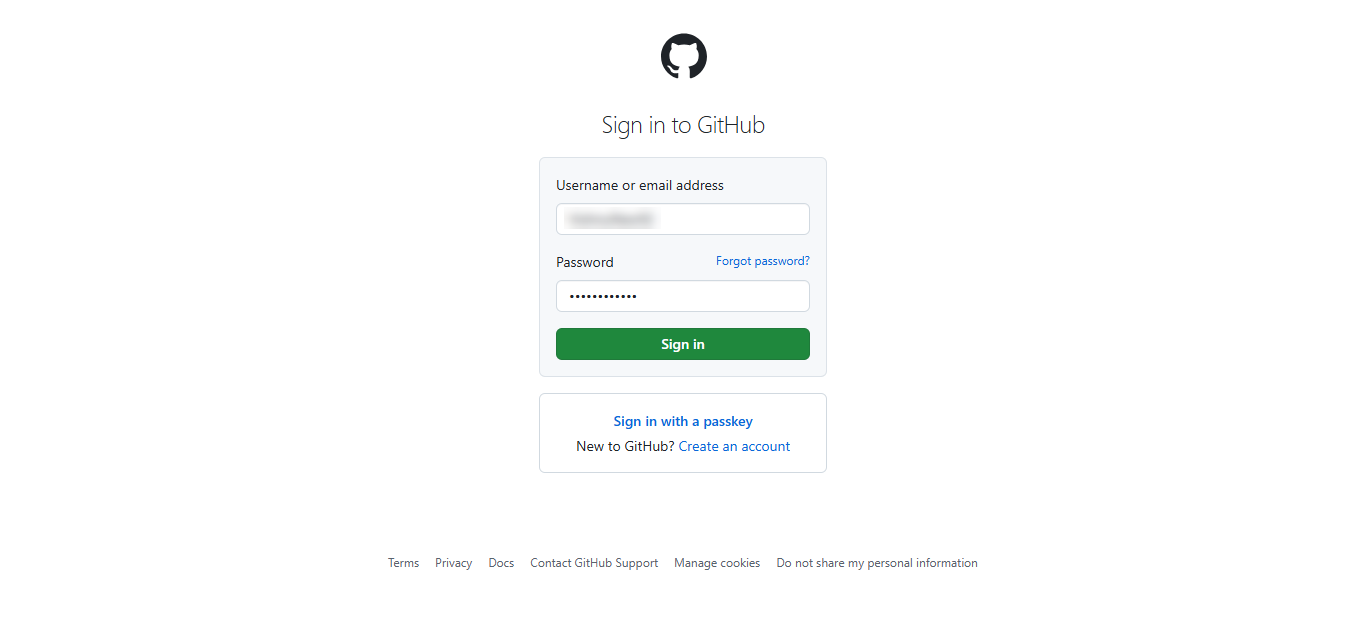
1.1.5. After successful verification the Sign in page will open up:
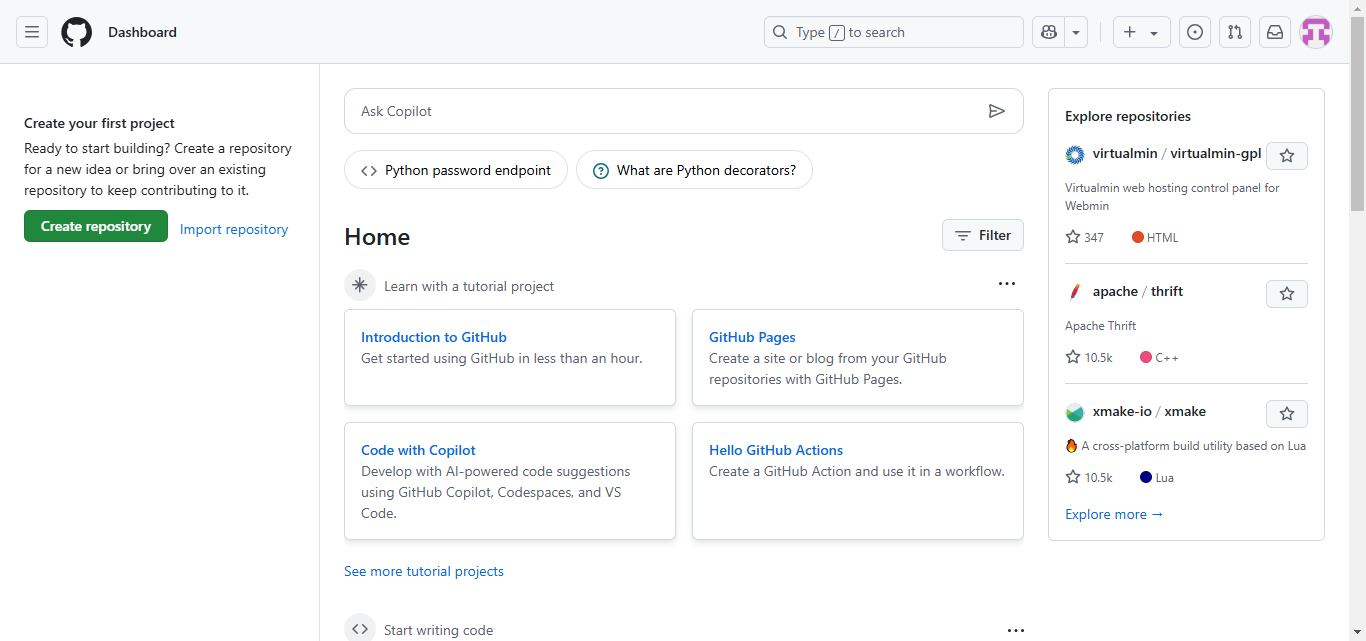
1.1.6. On Signing in, the GitHub home page will show up.
1.2. Request Access: After creating GitHub account send an official email to admin for the access of repository (in case of PDC, concerned person: MOHAMMED IRSHAD, contact mail: Request Access
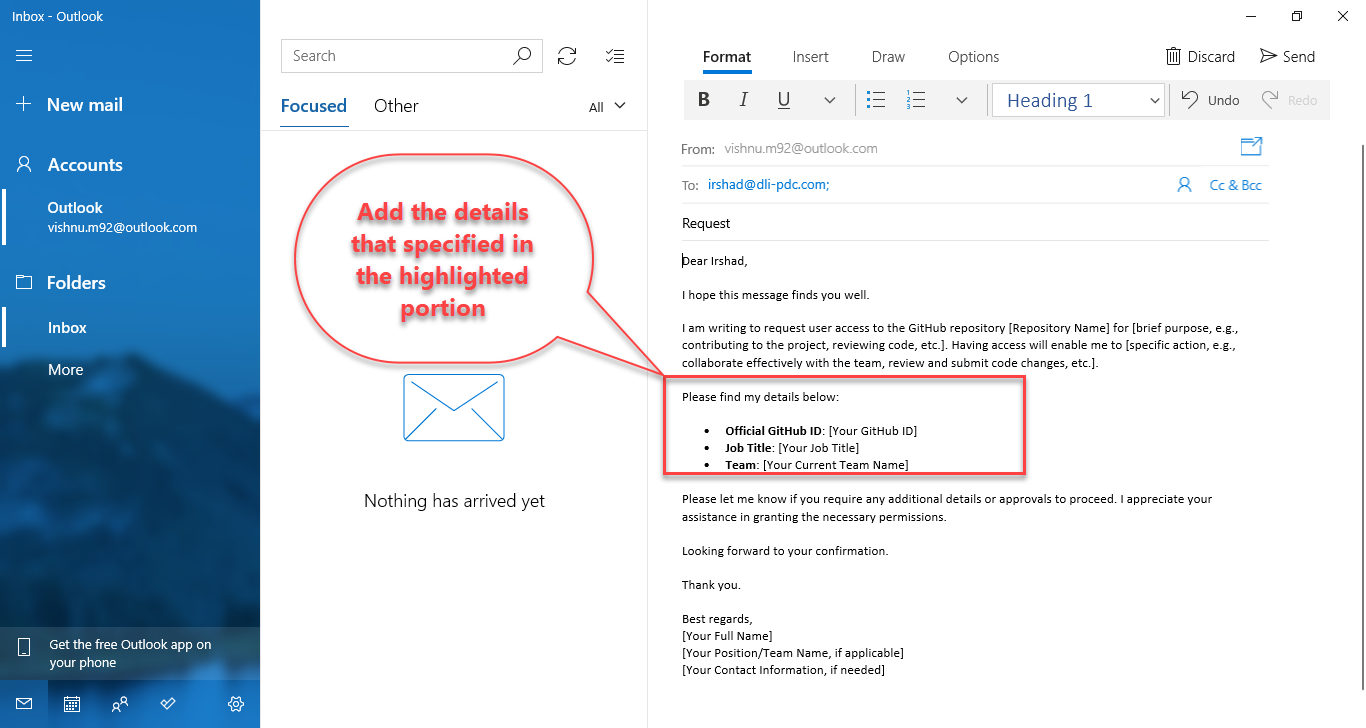
Note: While sending request include the following details
-
Official GitHub ID
-
Job Title
-
Team in which currently working
-
-
Download and Install the following applications from its link provided below as part of setting up the development environment.
• Visual Studio, Latest Ver.(Community Edition with .Net core 8, should not be older than 2022) https://visualstudio.microsoft.com/vs/
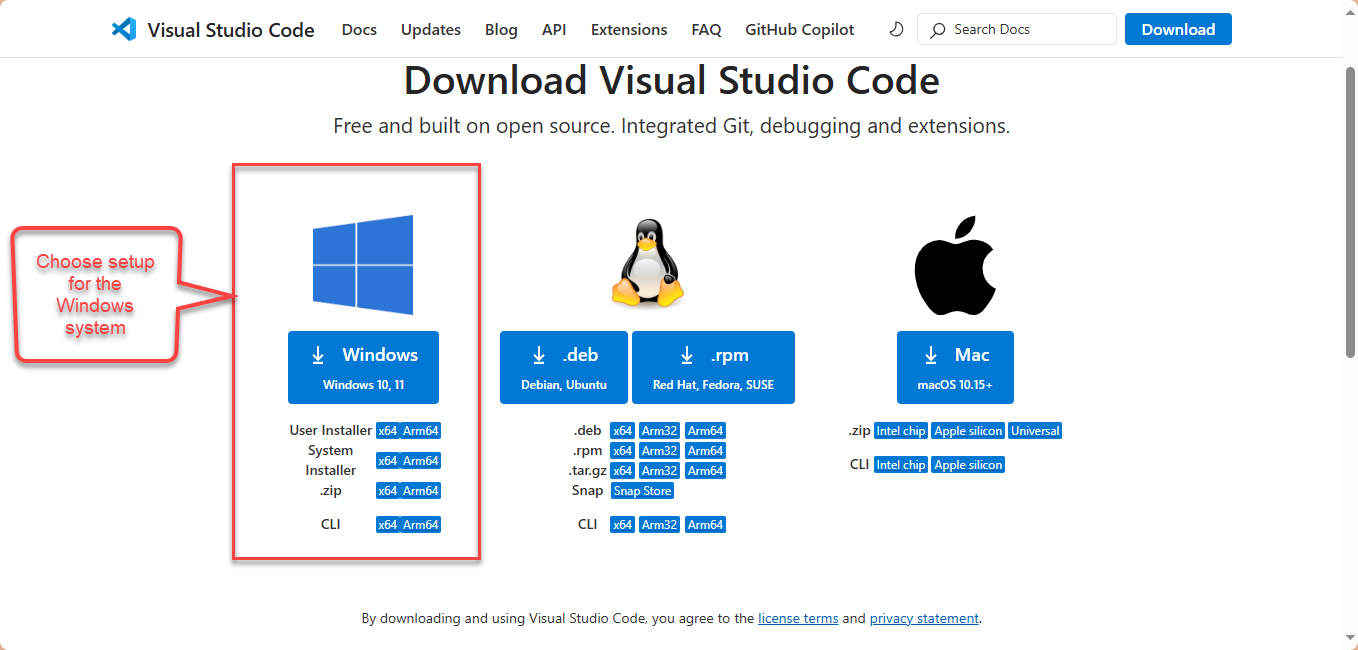
• Visual Studio Code https://code.visualstudio.com/download
Choose the Windows ver. setup before download
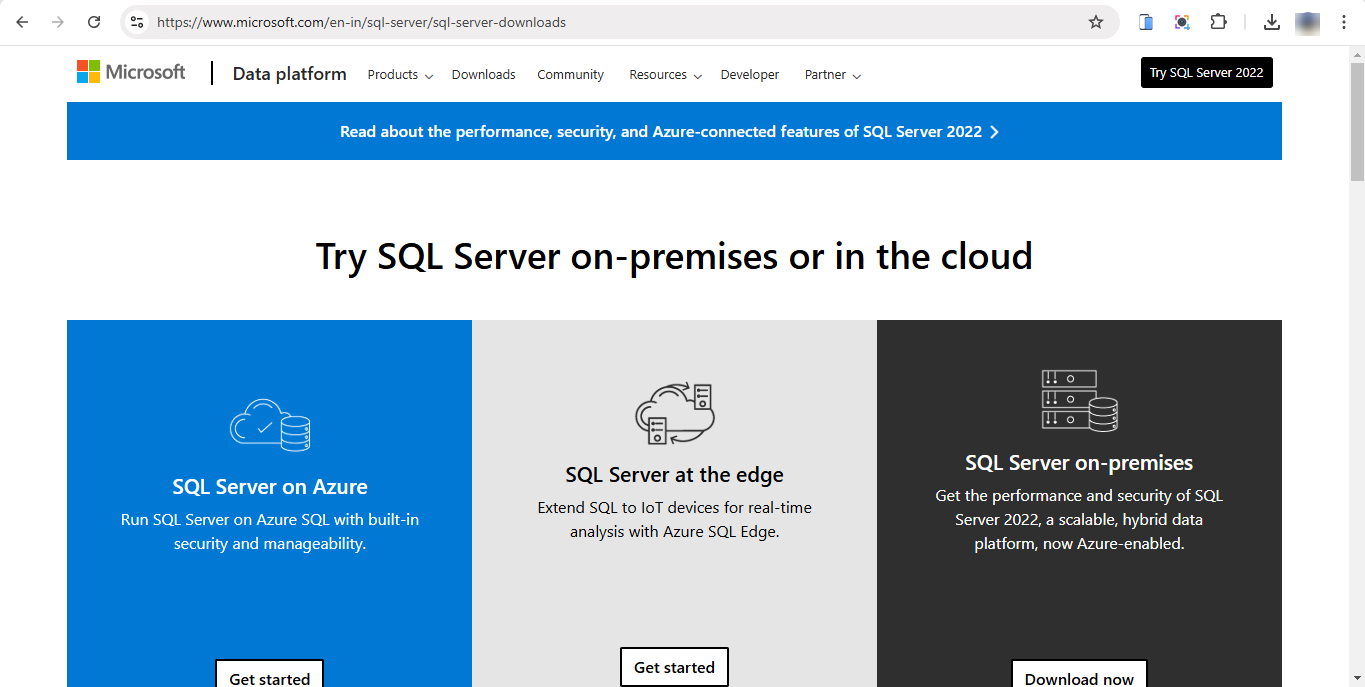
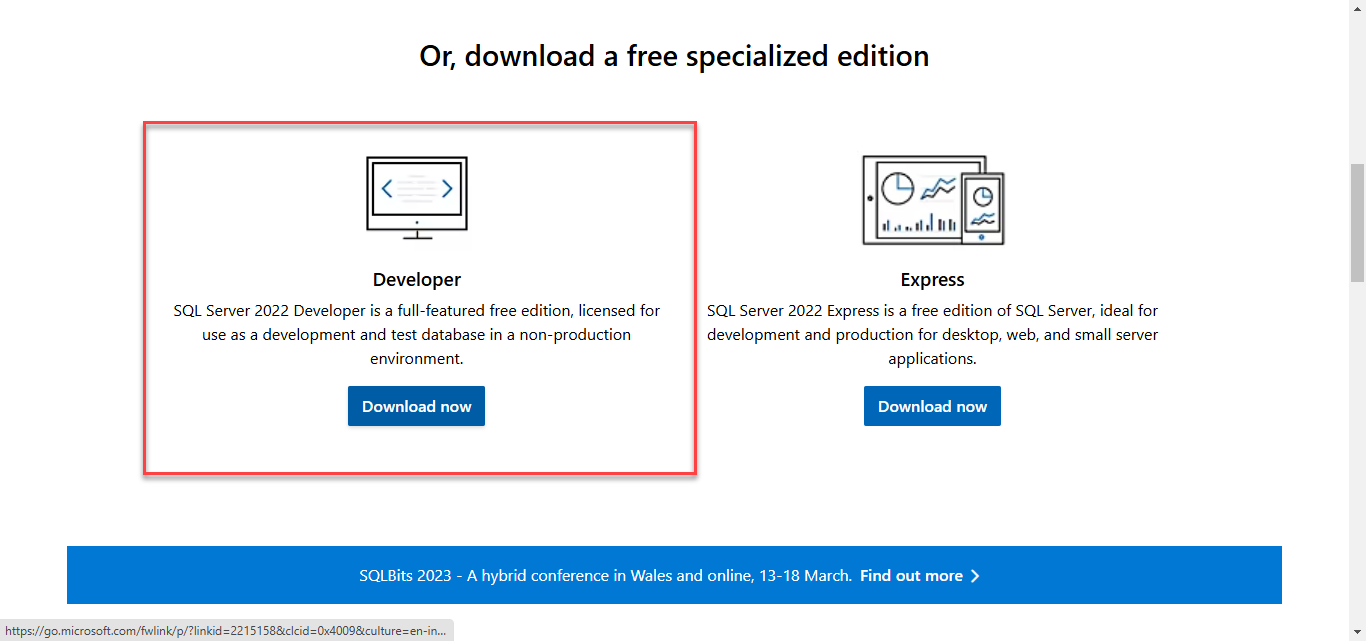
• MS SQL Server https://www.microsoft.com/en-in/sql-server/sql-server-downloads
Navigate to the above link, and scroll to the download section, click on Windows (Developer version) setup and start install process
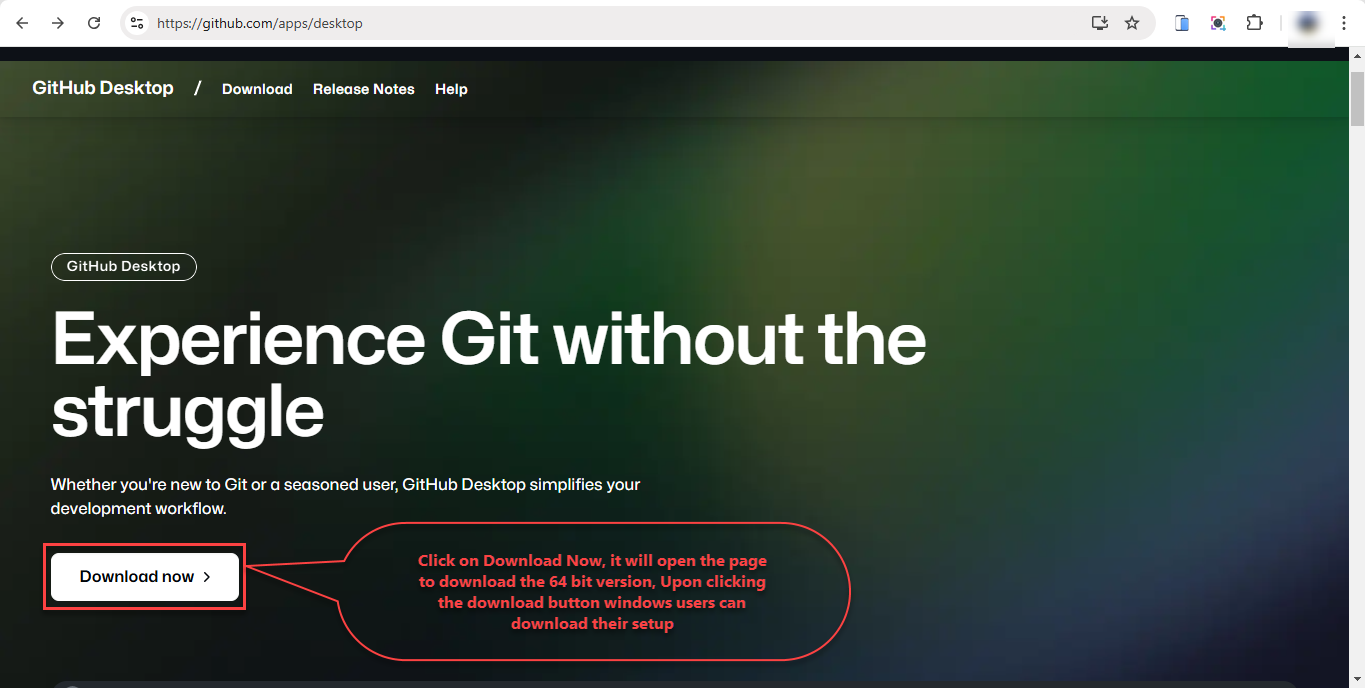
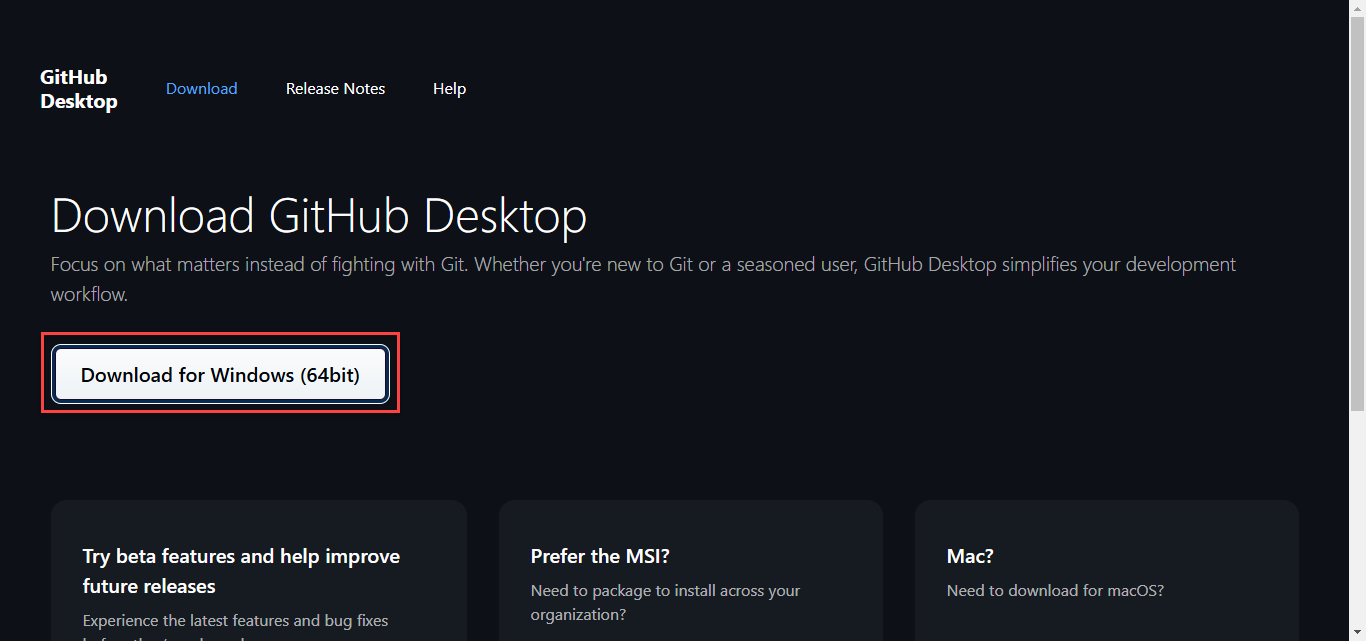
• GitHub desktop https://docs.github.com/en/desktop/installing-and-authenticating-to-github-desktop/installing-github-desktop
Click on the Download now button and click the Download for Windows button under download page.
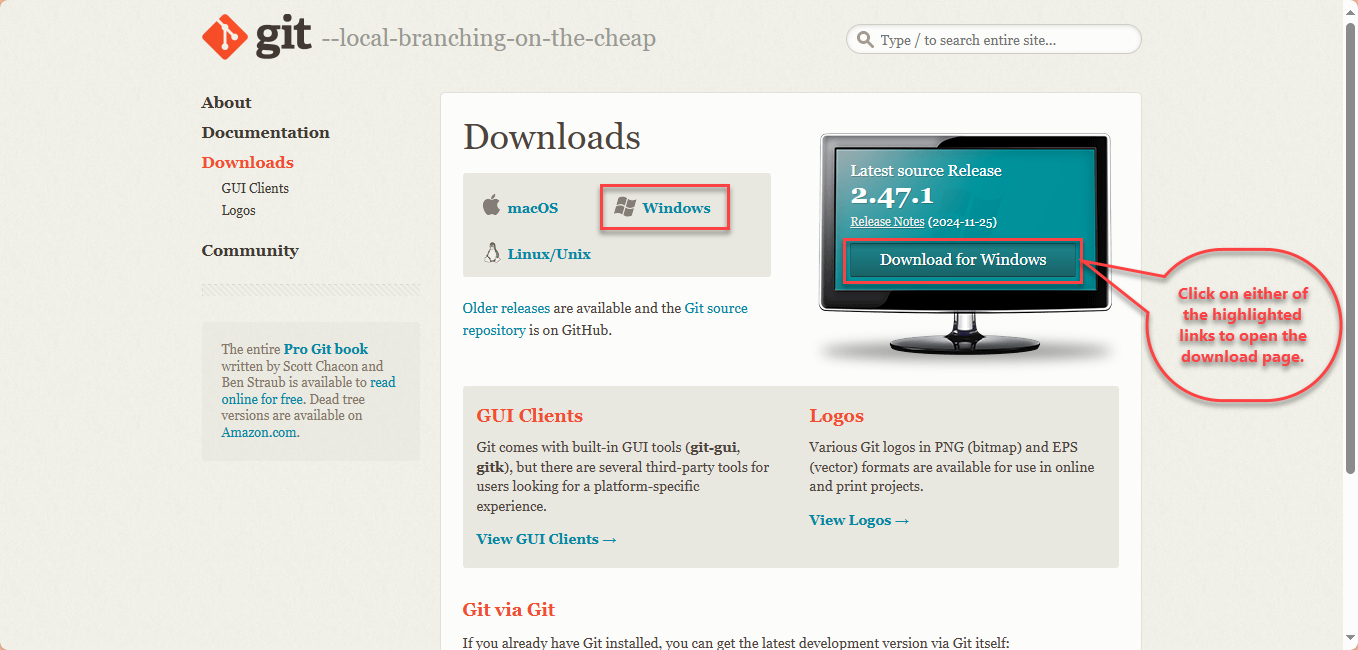
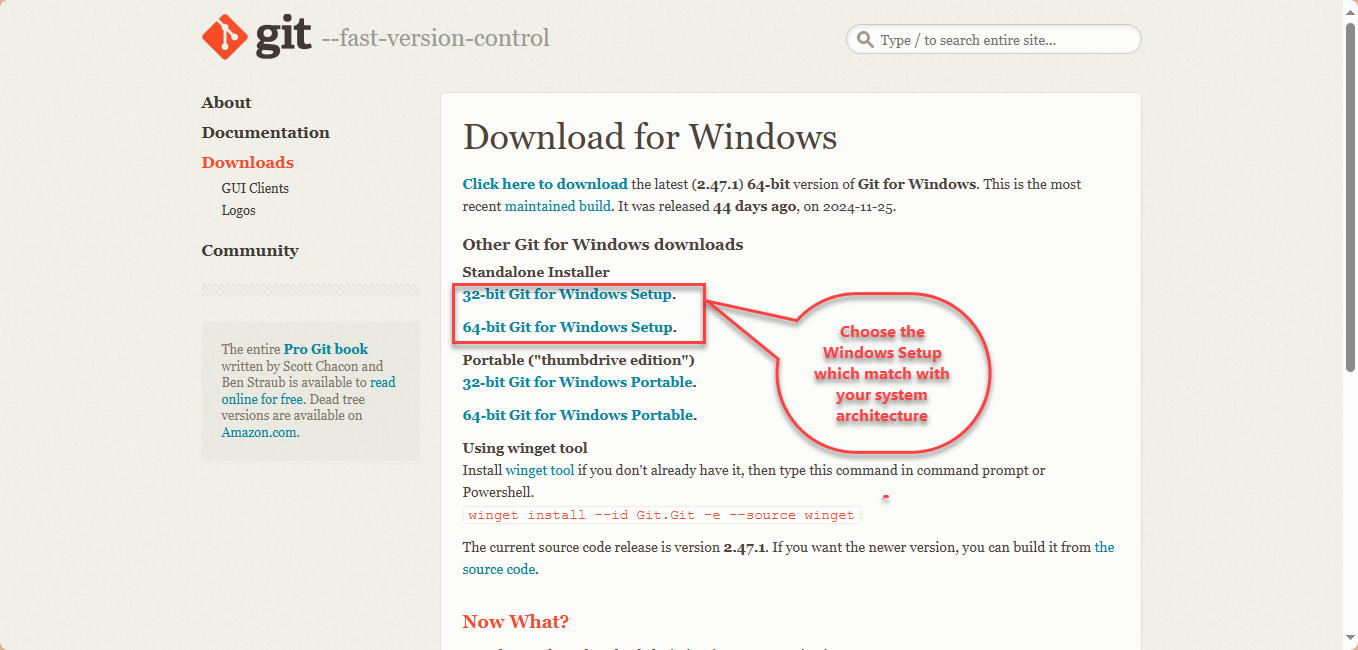
• Git https://git-scm.com/downloads
Install the Git by downloading the correct version of setup that match your OS and System architecture from the link given above
 • Angular
Install the angular by doing the following steps
Step 1: Install Node.js
Use the steps below to install Node.js
1) Node.js is a JavaScript runtime built on Chrome’s V8 JavaScript engine. It allows developers to run JavaScript on the server-side. To install Node.js, go to the official website https://nodejs.org/en/download/current
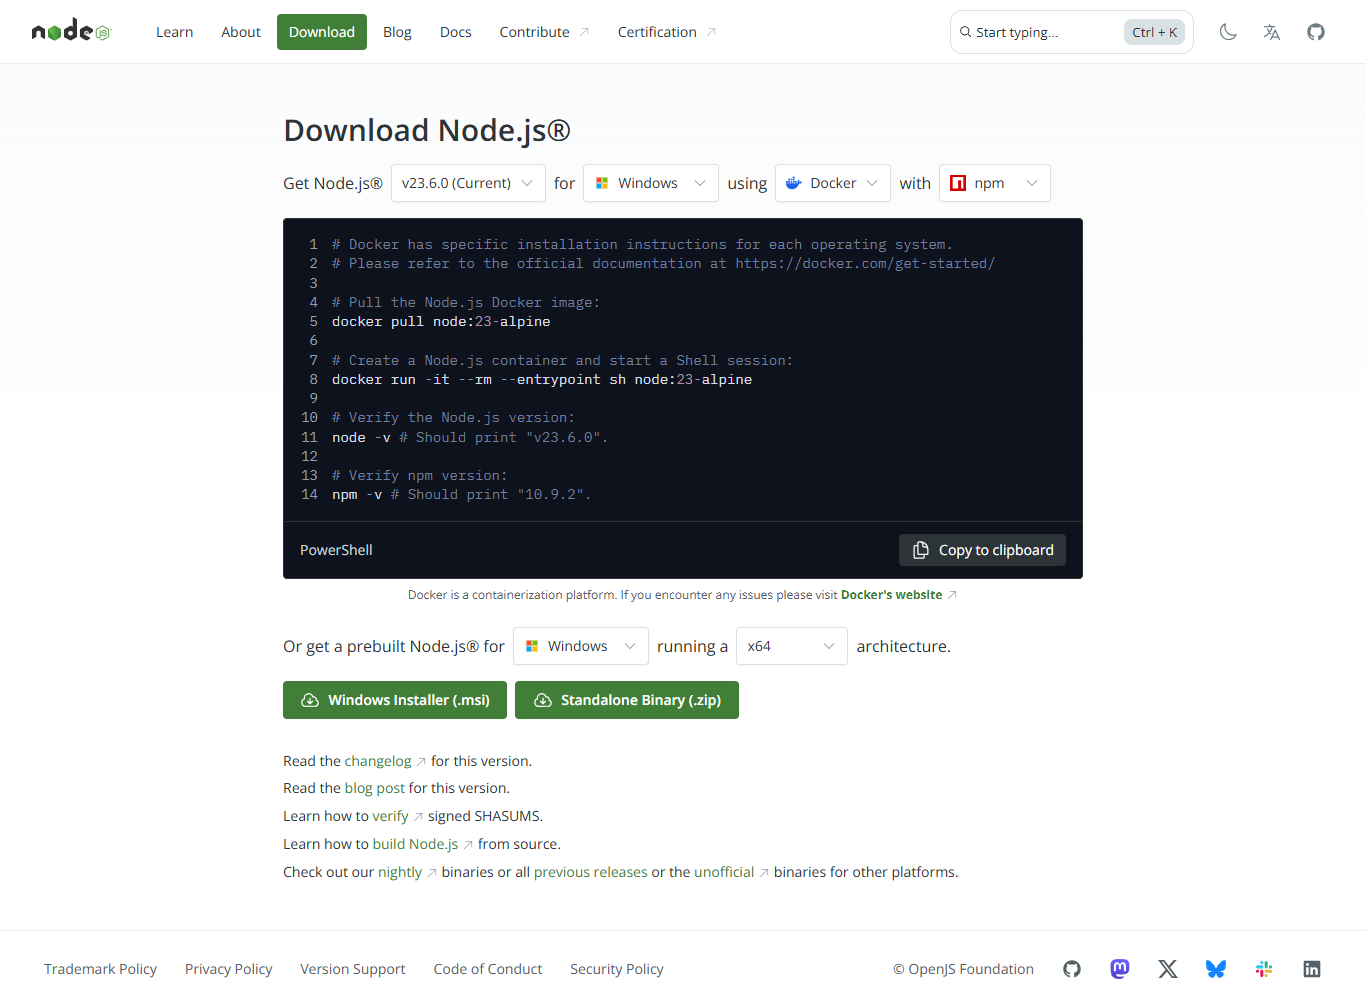
2) On the Node.js homepage, click on the “Downloads” button
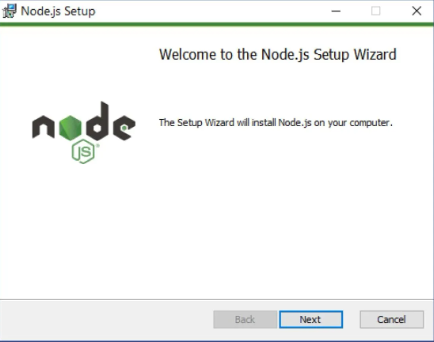
3) Double-click the installer file to open it.
4) The Node.js Setup Wizard will appear. Click “Next” to proceed.
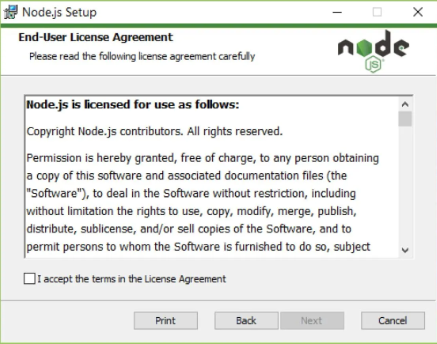
5) Read and accept the license agreement, then click “Next.”
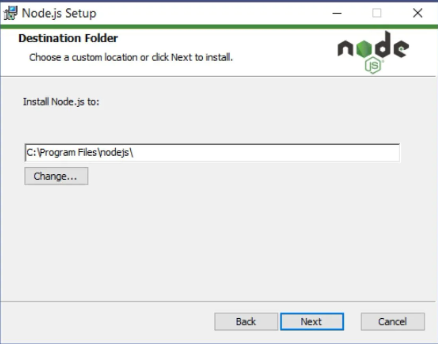
6) By default, Node.js will be installed in the “Program Files” folder on your system drive. You can change the installation directory if needed, but it’s recommended to keep the default settings. Click “Next.”
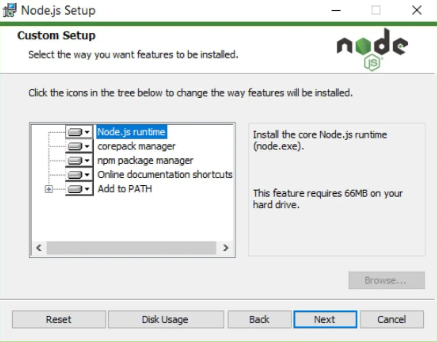
7) On the “Select components” screen, you can choose which components to install. It’s recommended to keep the default selection, which includes the necessary components for most Node.js applications. Click “Next.”
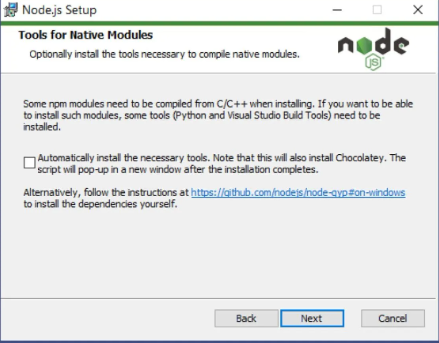
8) You can skip this step if you prefer. Installing native modules is not required and takes up approximately 3GB of storage on your system.
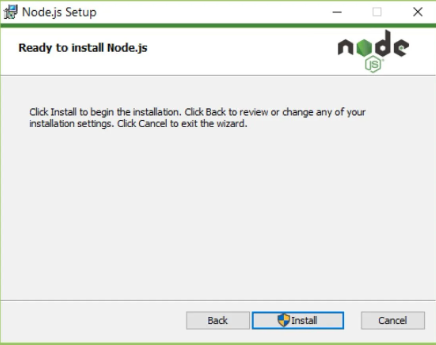
9) On the “Ready to install” screen, review your installation preferences. If everything looks correct, click “Install” to begin the installation process.
Step 2: Open Command Prompt
Once Node.js is installed, open the Command Prompt. You can do this by pressing the Windows key + R, typing cmd, and pressing Enter.
Step 3: Verify Node.js and NPM installation
To ensure that Node.js and NPM (Node Package Manager) are installed correctly, open a terminal or command prompt and type the following commands:
For Node.js:
node -vFor NPM:
npm -vStep 4: Install Angular CLI
To install Angular, we first need to install Angular CLI (Command Line Interface) using npm. In the Command Prompt, type the following command and press Enter:
npm install -g @angular/cliTo verify the installed version after the installation, please use the following command:
ng version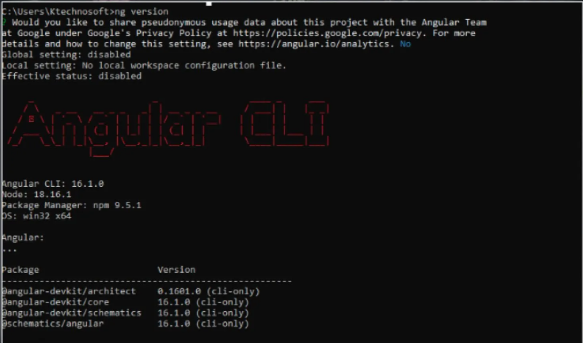
-
if the above steps completed, then clone the required repositories from the GitHub Desktop or GitHub web, the steps for clone are given below:
3.1. By using GitHub Desktop
3.1.1. After completing installation and account authorizing process, open the Desktop application, on the screen that opened there is current repository section
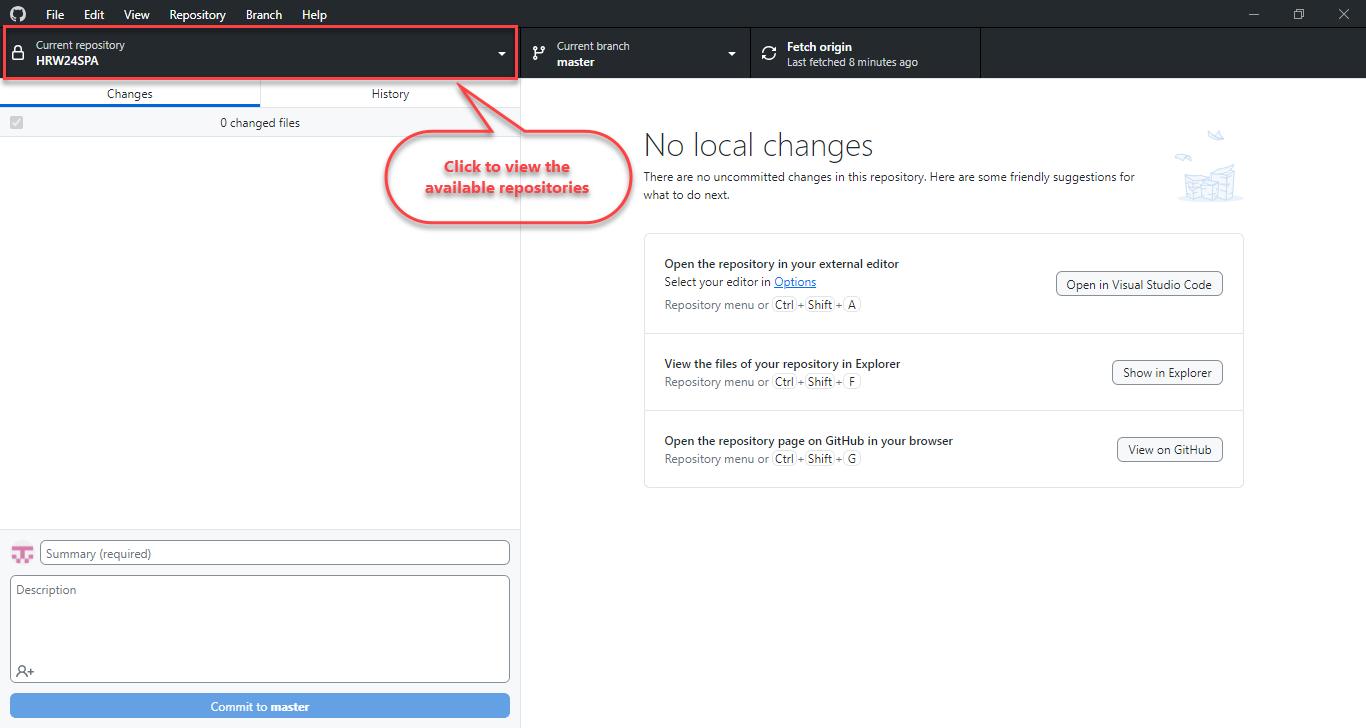
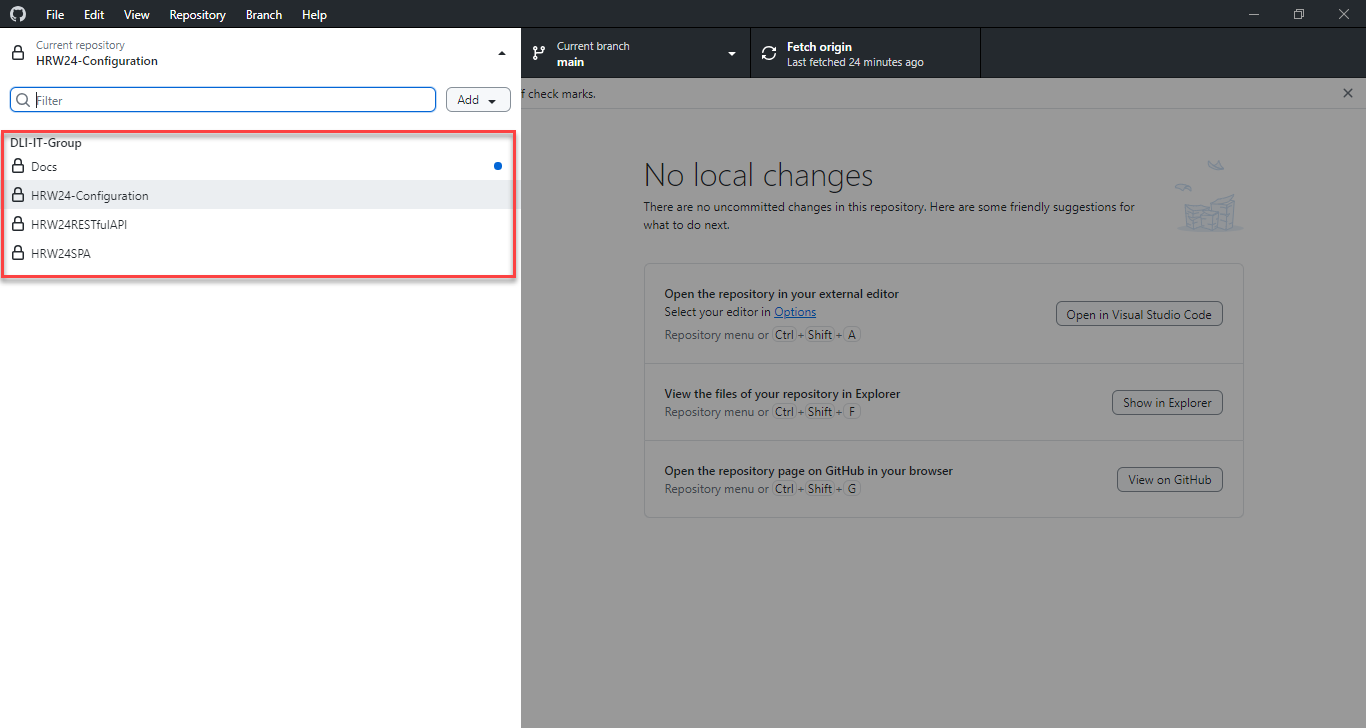
3.1.2. Click on the Current Repository section, it will show up all the repositories that cloned by the user
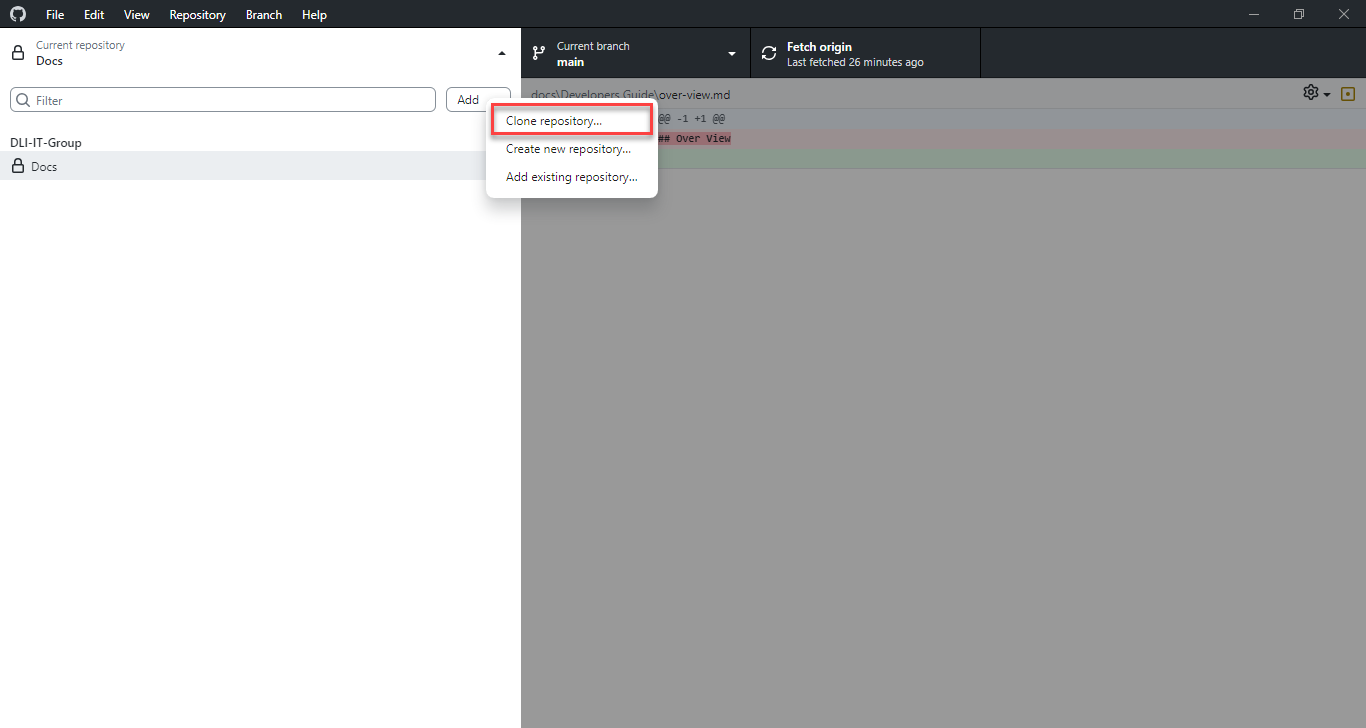
3.1.3. Click on the Add button to get the clone option from the drop down containing repository related options.

3.1.4. From the options, select the clone option
3.1.5. A pop-up displaying the available repositories under the main branch will appear. Select the required repository or repositories to be cloned.
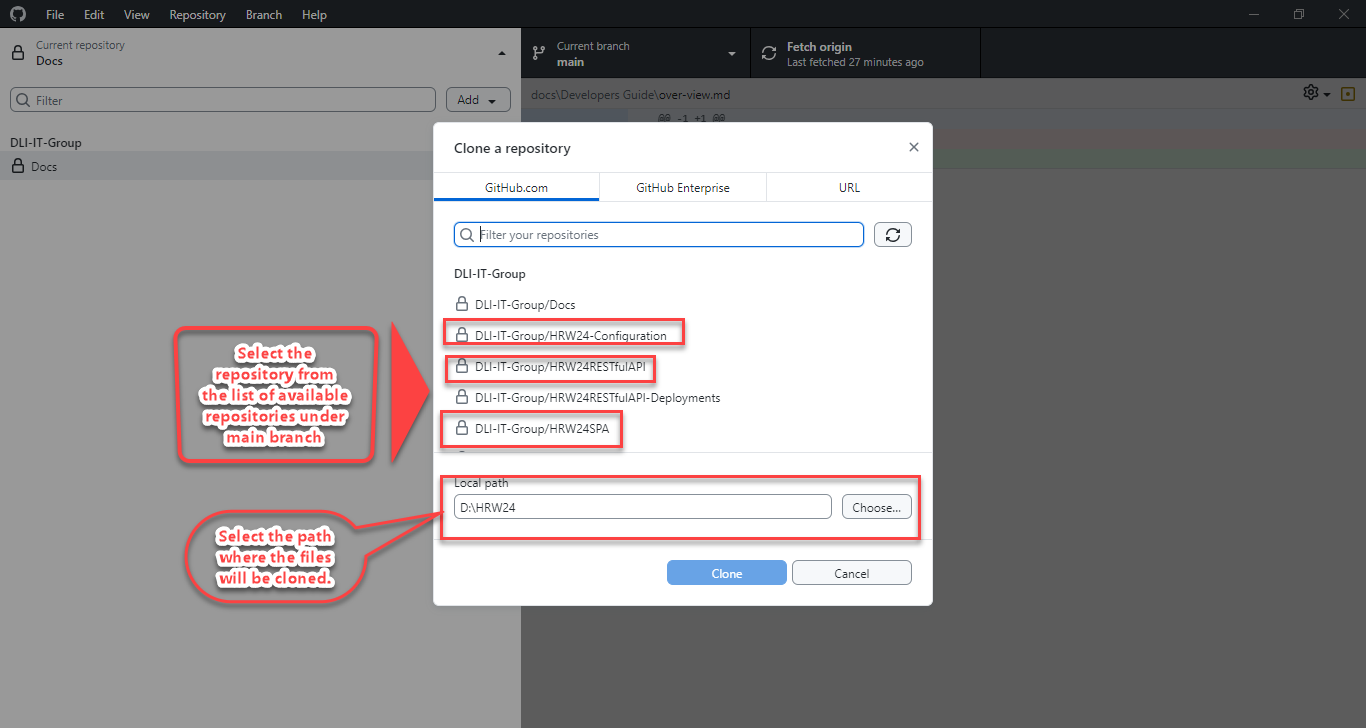
3.1.6. Add the path in the field provided, by typing or browsing to the specific location.
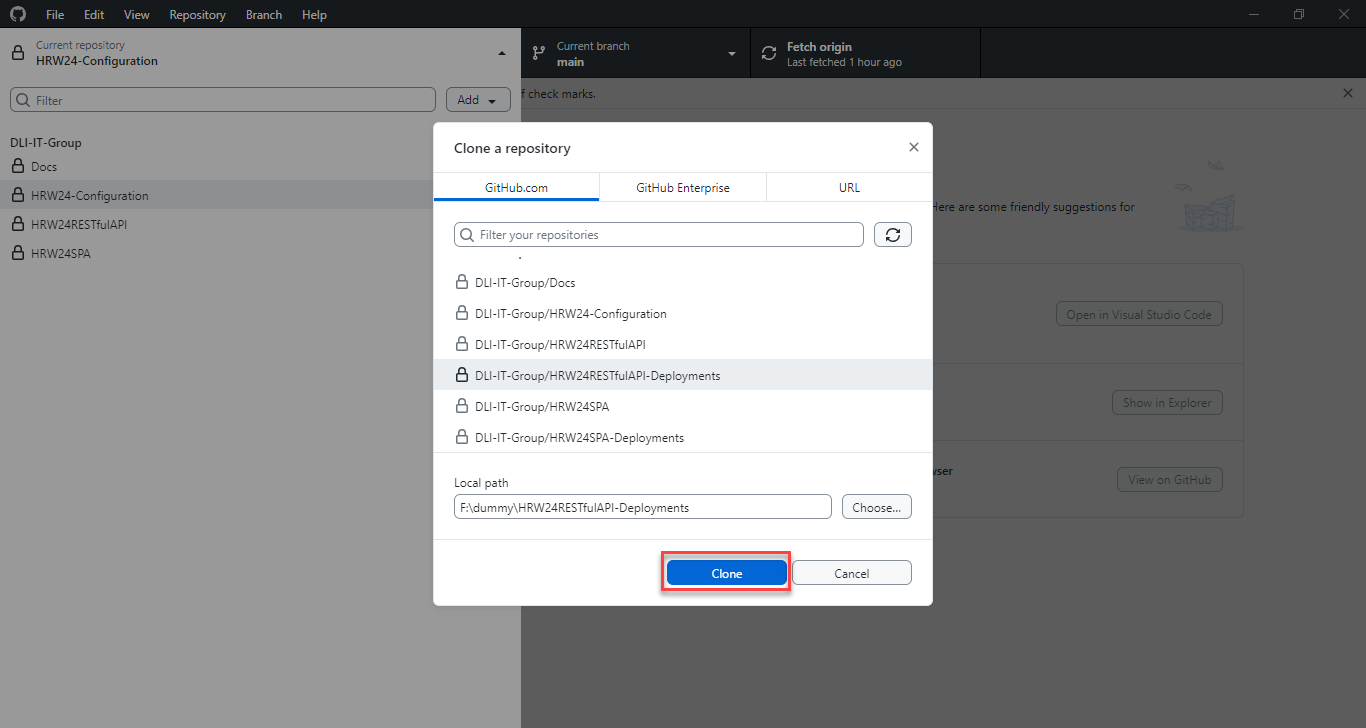
3.1.7. Click on the clone after choosing repository and path to clone.
3.1.8. The folder will be created and files will be transferred in the path specified
3.1.9. Repeat the same steps for other repositories also
Navigate to the following URL to get details about clone repository in GitHub Desktop https://docs.github.com/en/desktop/adding-and-cloning-repositories/cloning-and-forking-repositories-from-github-desktop
3.2 By using GitHub Web
The URL given below will provide the necessary steps for creating clone of the repository to your GitHub https://docs.github.com/en/repositories/creating-and-managing-repositories/cloning-a-repository