Testers Guide/Devops Guide
HRW24SPA Application testing - Necessary steps to follow
Pre-requisites
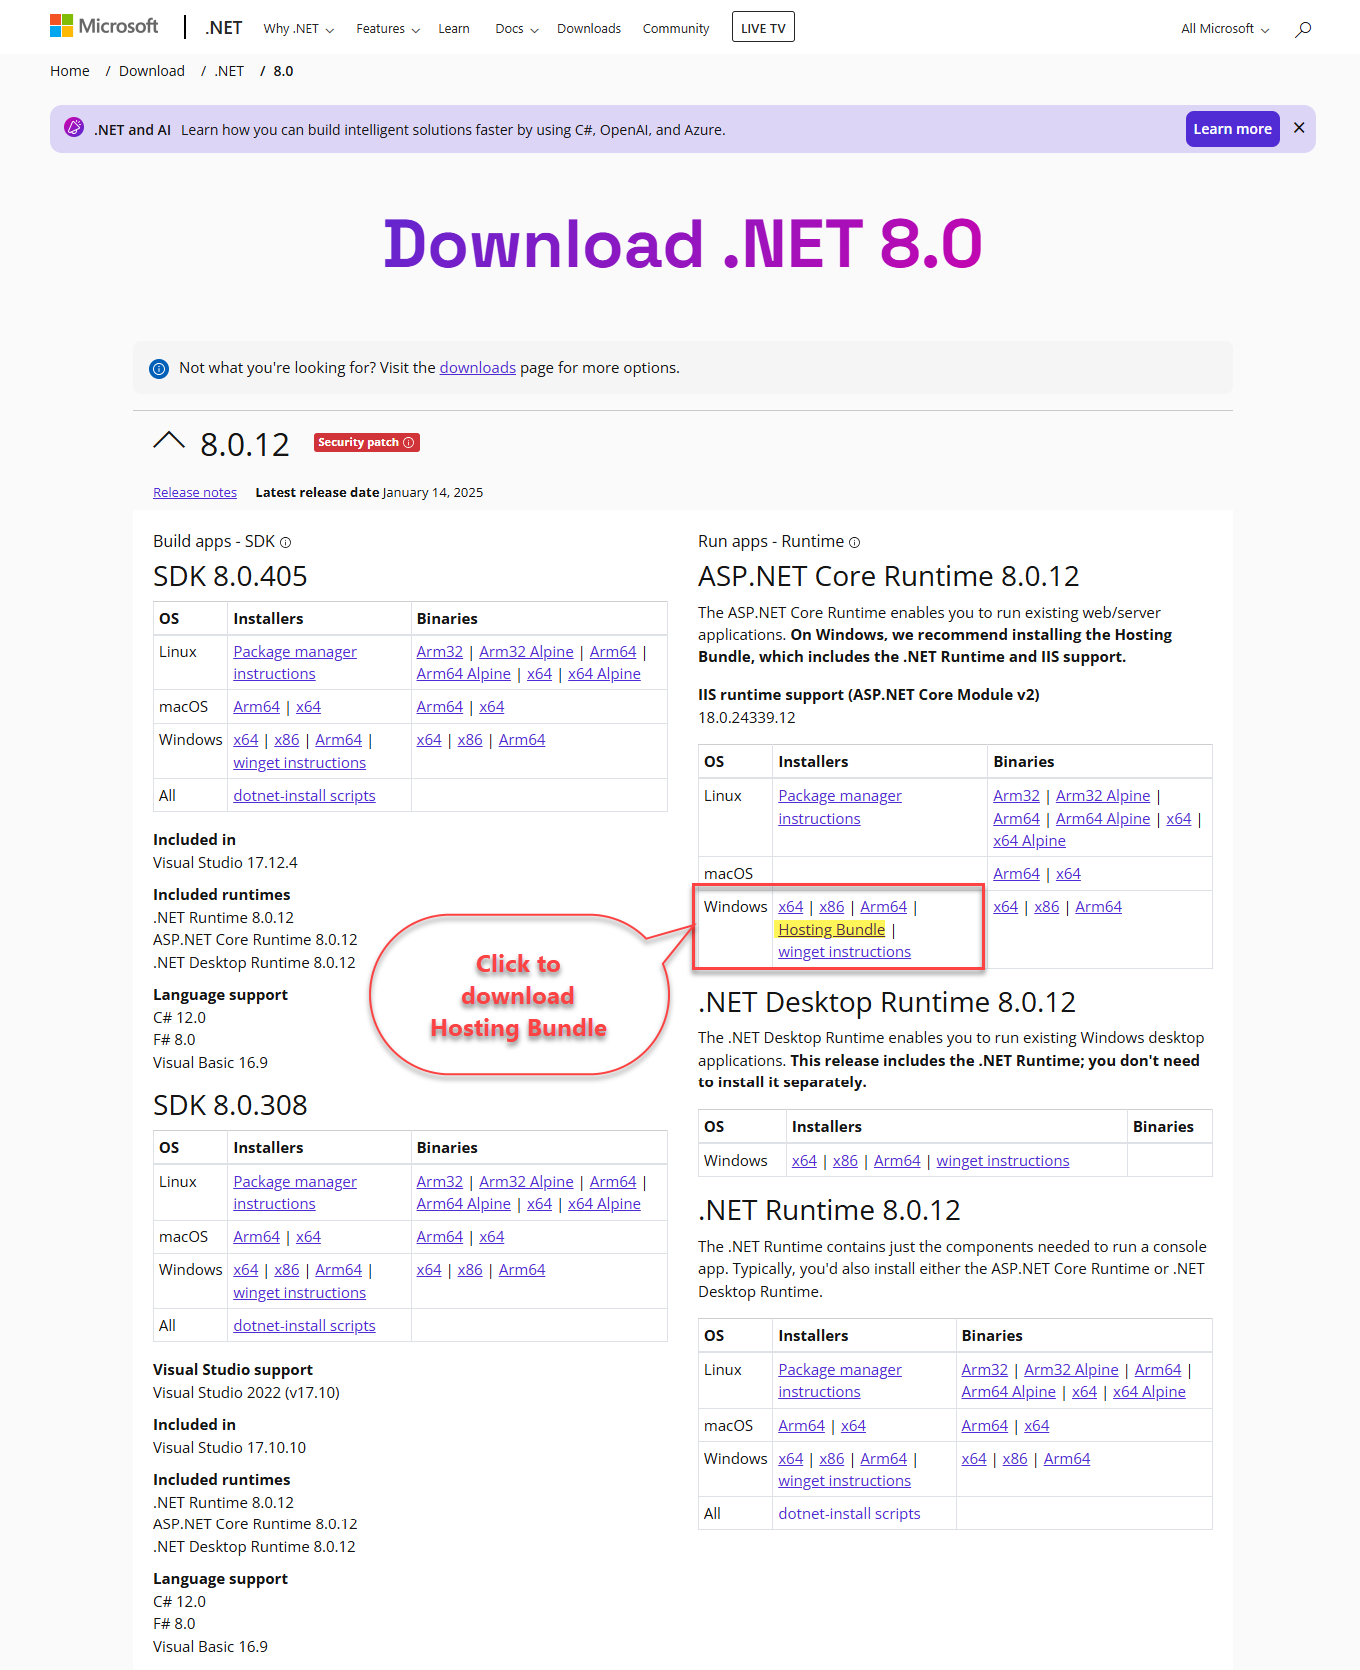
💡 Before starting please ensure that you installed the Hosting Bundle in your system, otherwise download and install it from the following link: ASP.NET Core 8.0 Runtime (v8.0.12) - Windows Hosting Bundle Installer
💡 Make sure that you accomplished the mapping of MIME associated with IIS in its core settings to avoid site loading issues. Click here to navigate to the page contains IIS configuration steps for mapping
💡 ESS Integrated Pages in HRW24 SPA: The ESS related pages are viewable in the HRW24 SPA's framing, for that do the steps mentioned under the HRWorks Plus Integration page. Click here to reach the page
Step 1. Getting Deployment Files to Run locally
- If you have the GitHub access to the project repositories, then sign in with your login ID.
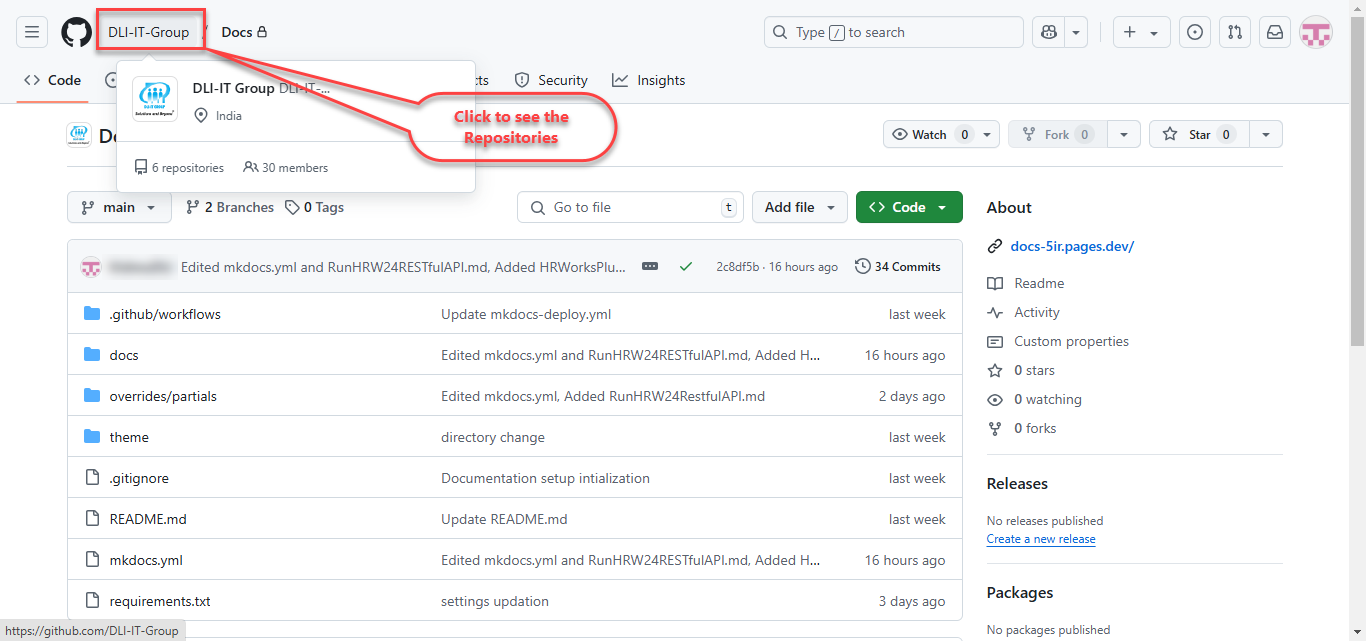
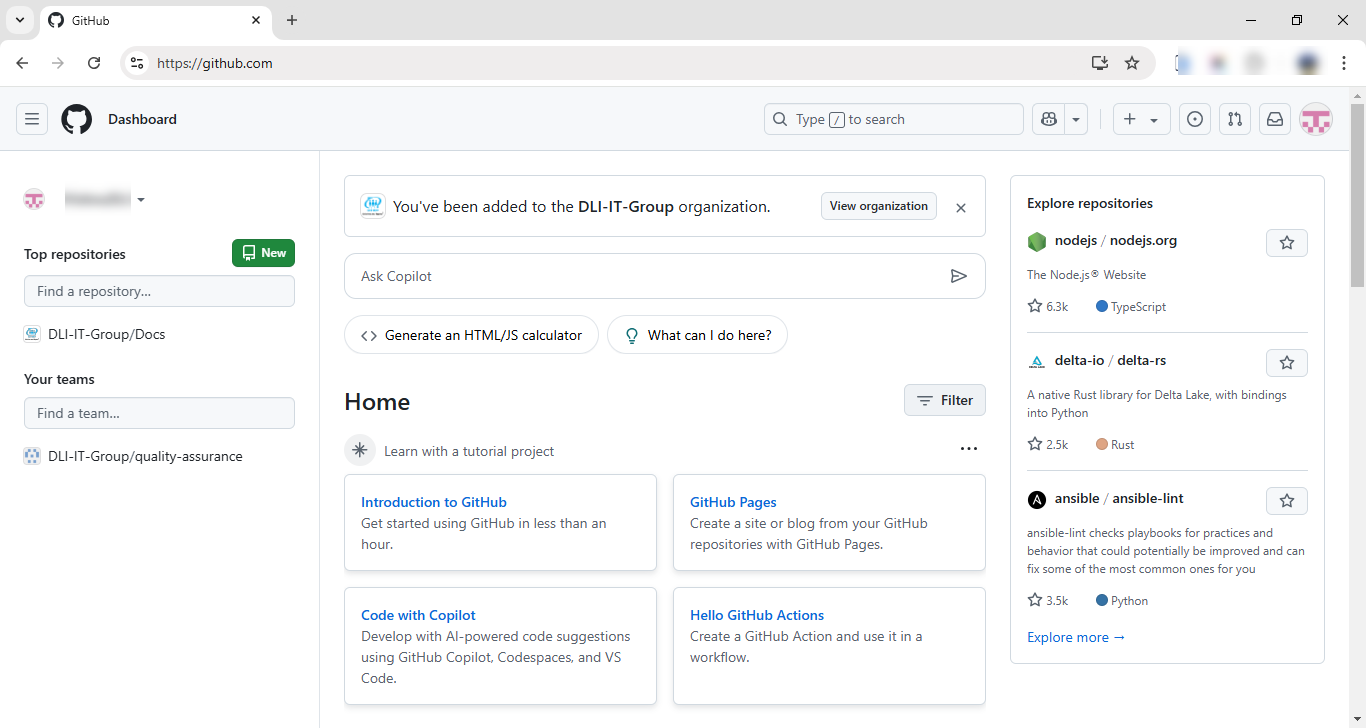 2. Find the repository link given at left side menu of your home page
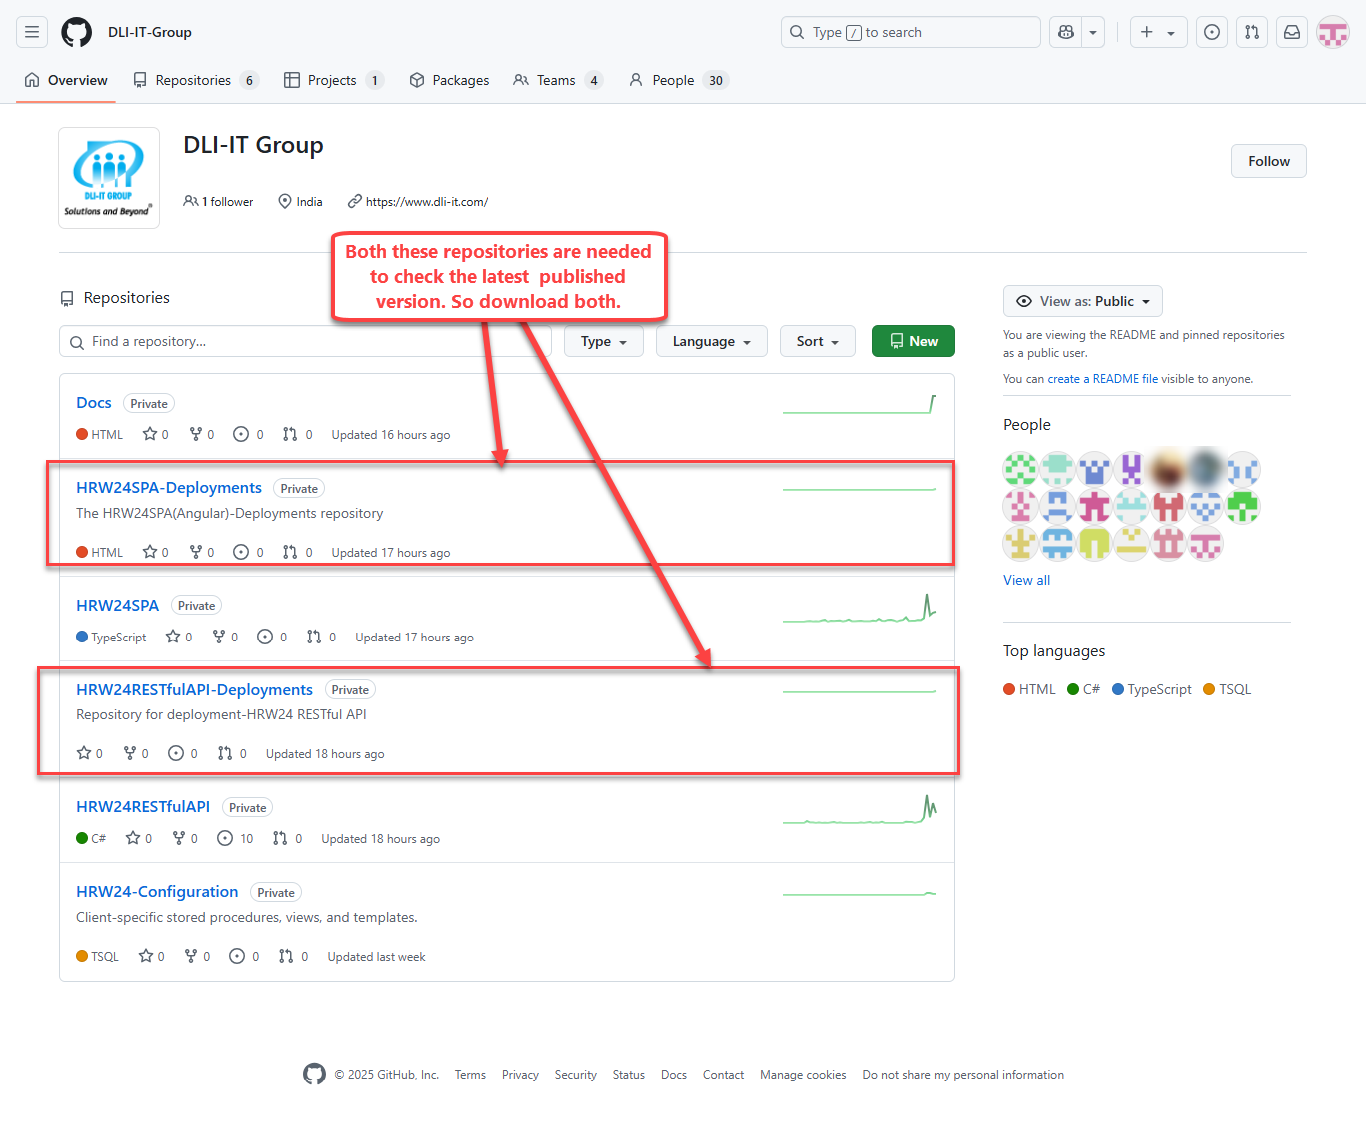
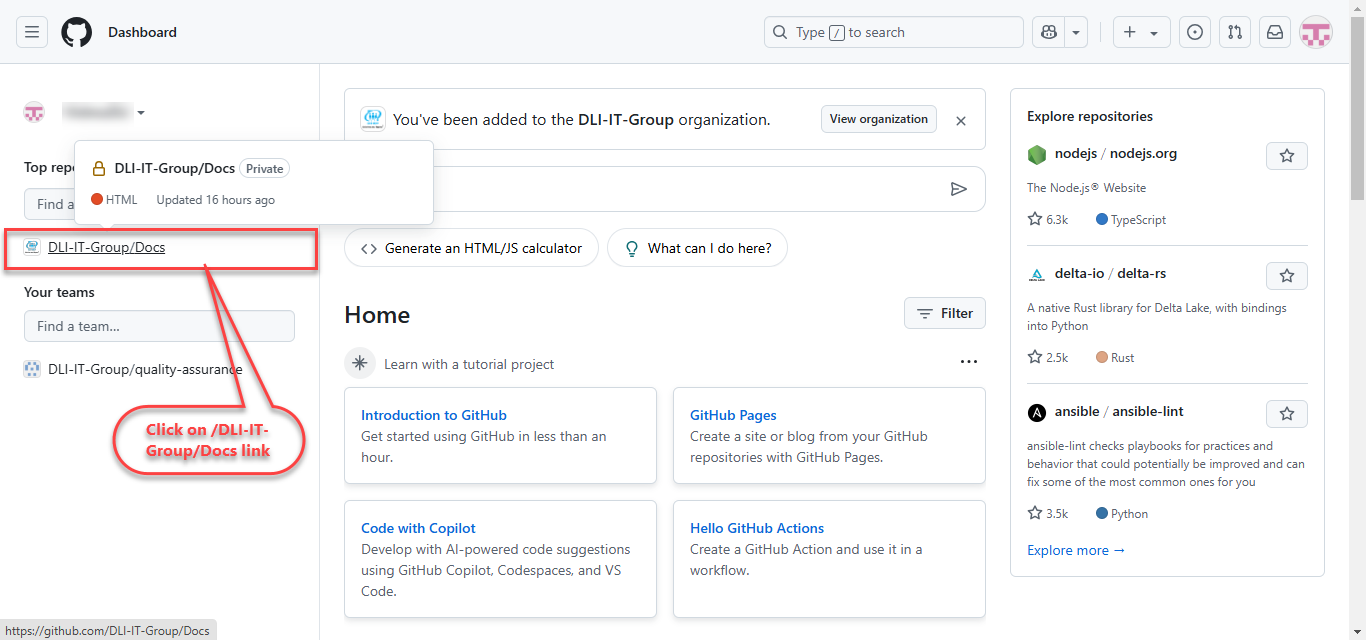 3. Upon clicking which, you will reached on the contents section. Then click the on the title DLI-IT-Group. So the page will open which displays all the repositories under DLI-IT-Group.
 4. So we need only repositories which have the deployed application files. That are HRW24SPA-Deployments, HRW24SPA-Deployments. Next we need to download these repositories to our system. For that, do the simple steps that listed below:
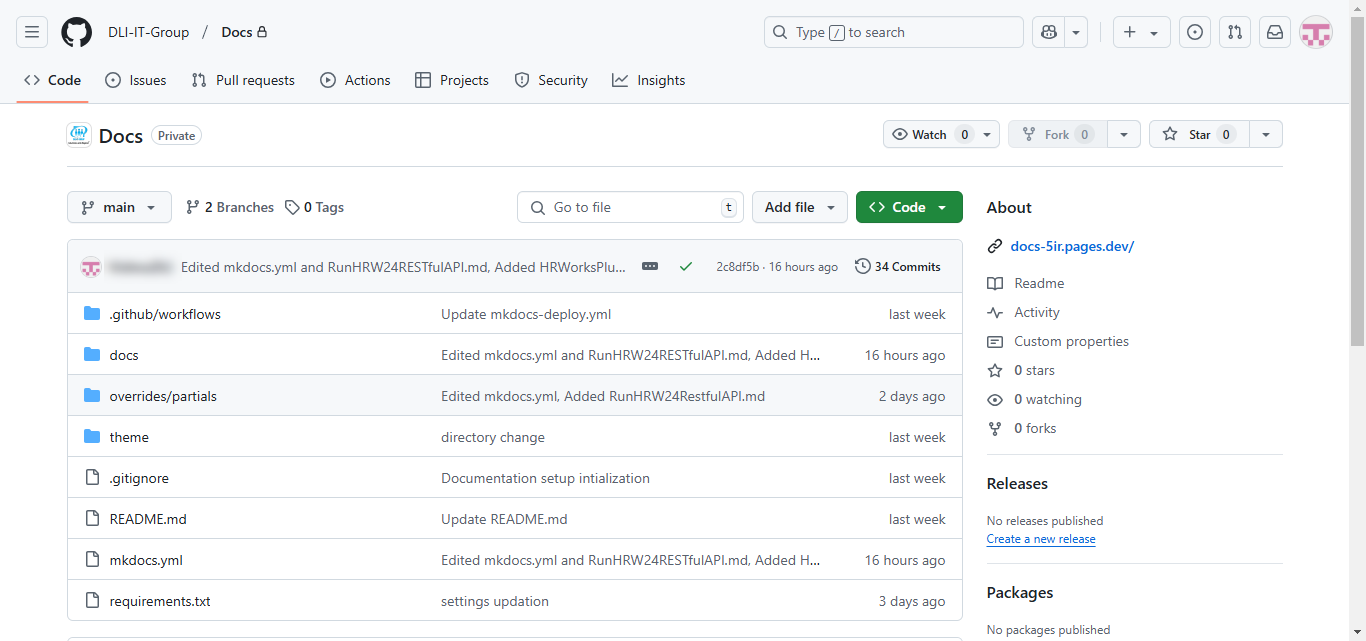
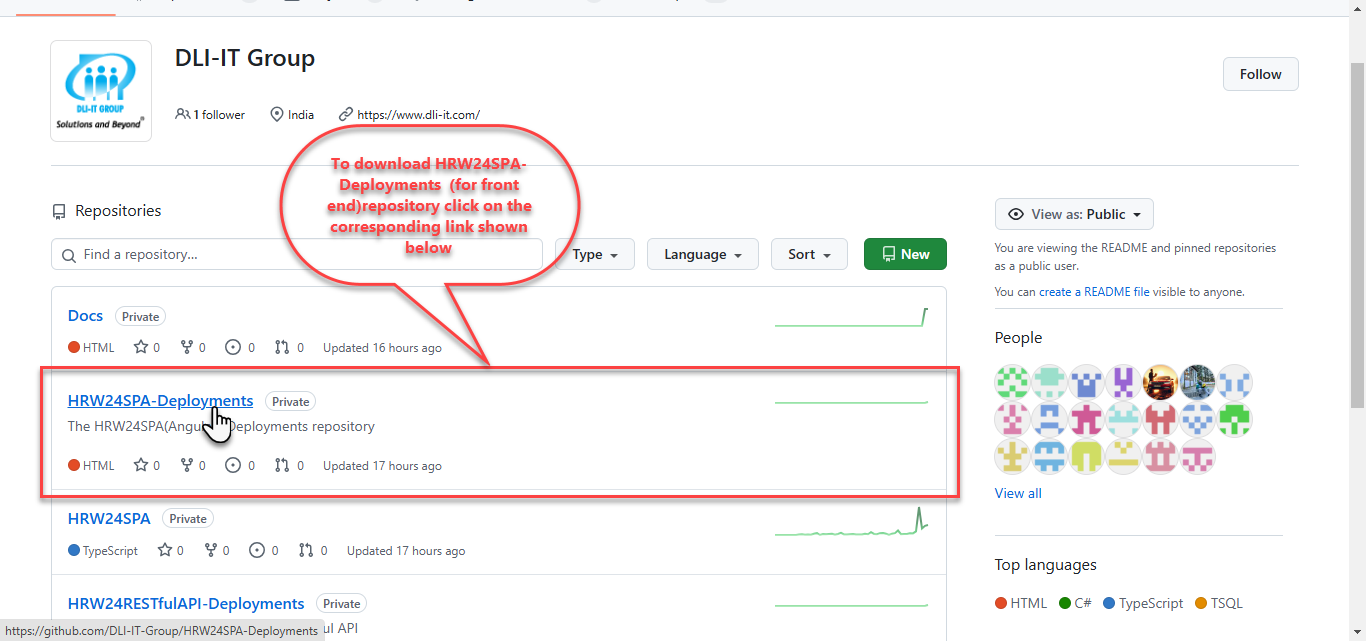
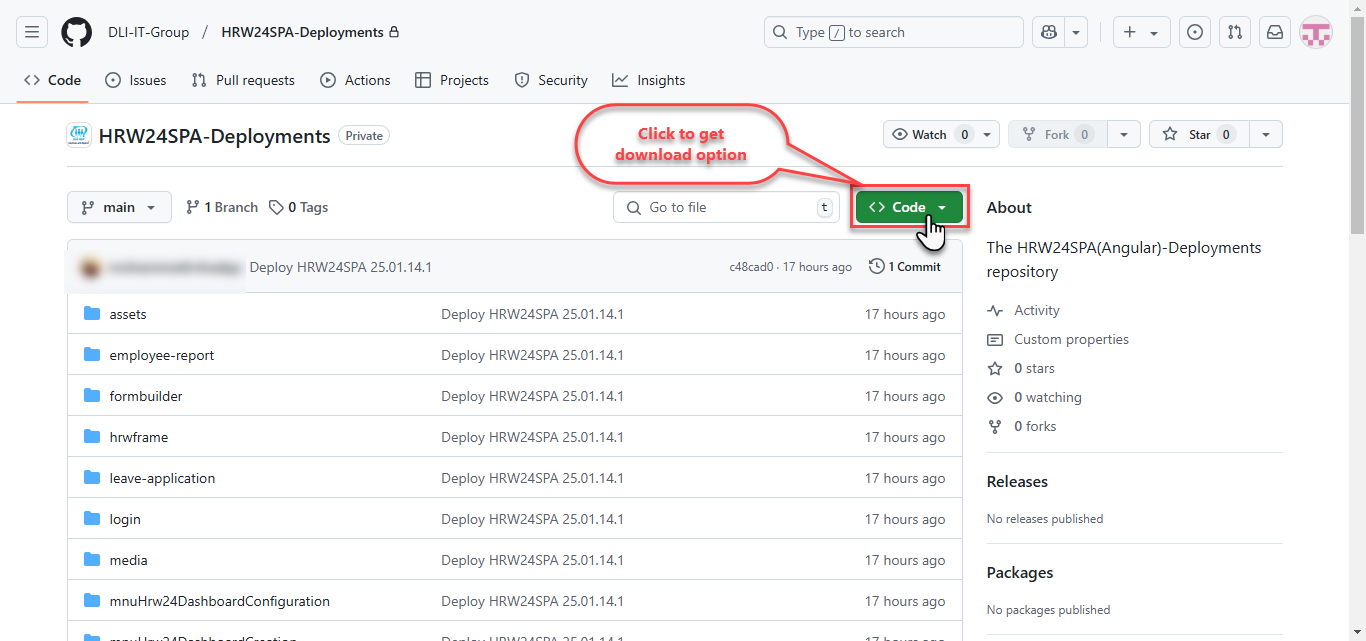
4.1. Each repository is given with its own link to its content page, so click on the HRW24SPA-Deployments link, its content page will open up:
4.2. Click on the Code button.
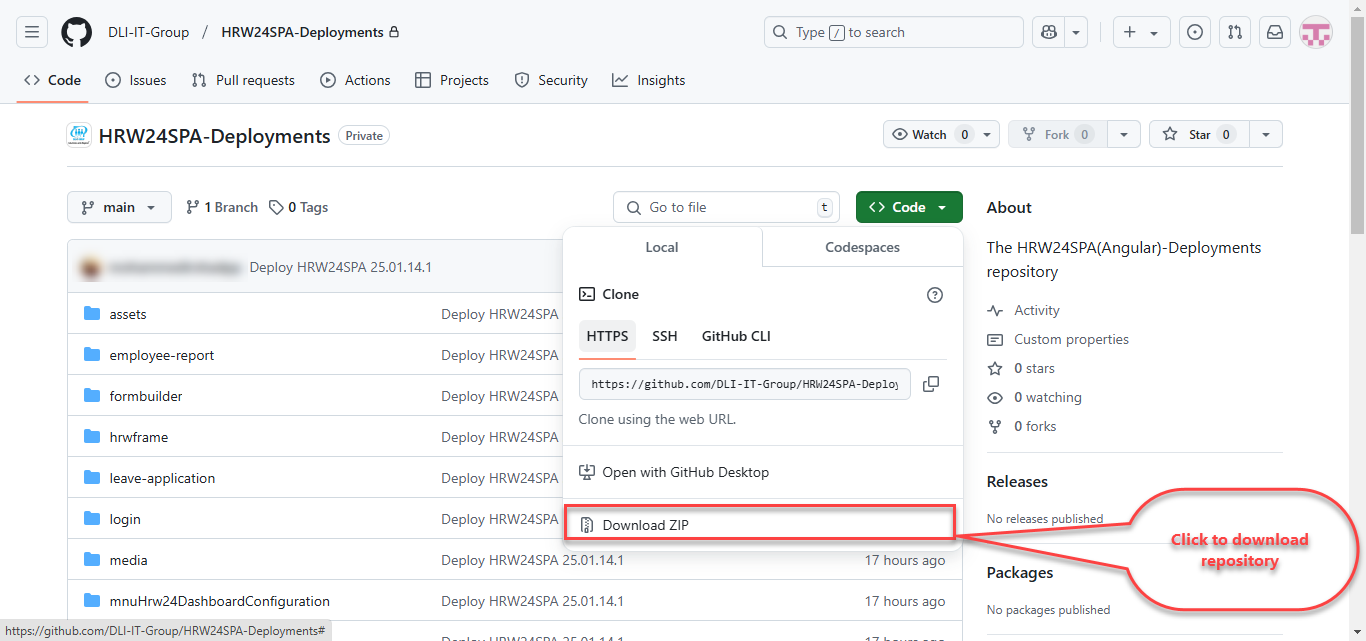
4.3. From the pop-up thats open up, click on the Download Zip option.
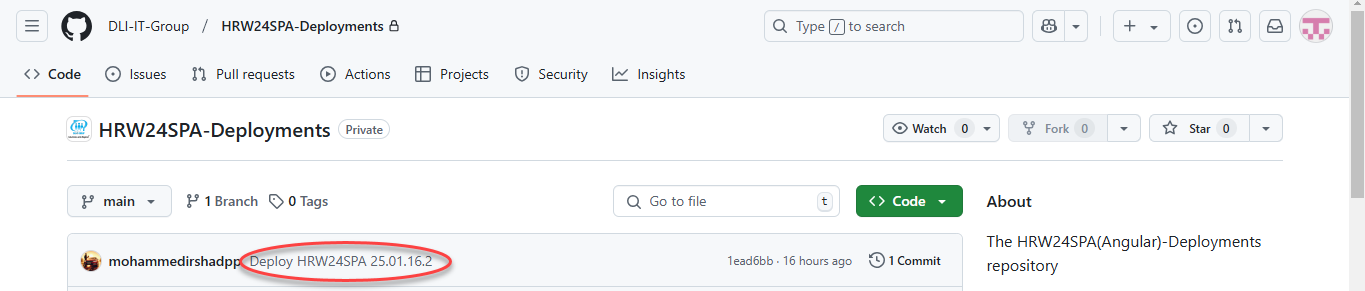
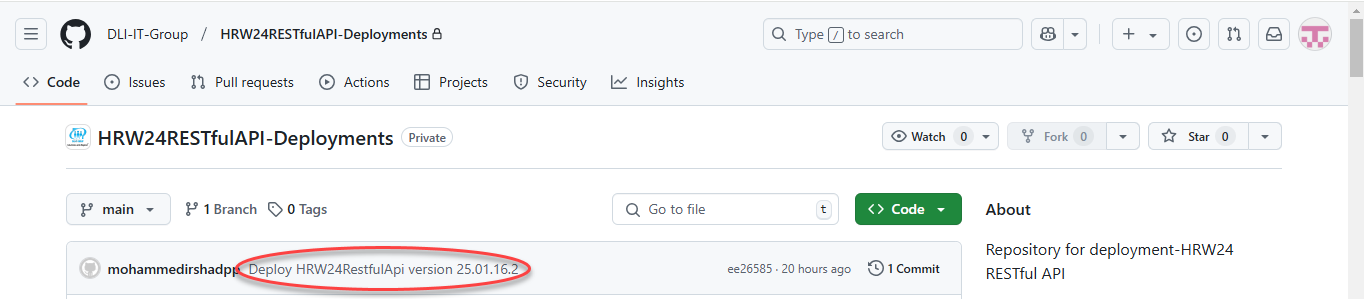
Info
Before downloading, ensure you check the versions of both HRW24SPA-Deployments and HRW24RESTfulAPI-Deployments. The versions are displayed on the repository page at the top of the repository contents, next to the header.
Check the below images
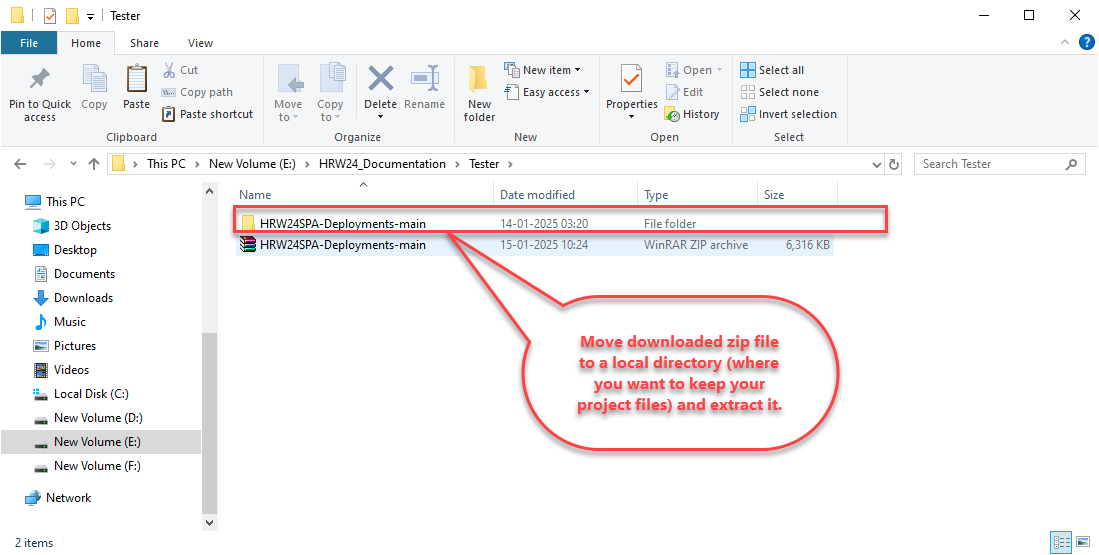
4.4. Copy / Move the downloaded file to a local directory, where you want to keep your project files, then extract the file.
4.5. Repeat the same steps for HRW24RESTfulAPI-Deployments.
Step 2. Hosting Deployed Files
Host the deployed files in your local folder using IIS by doing the following steps
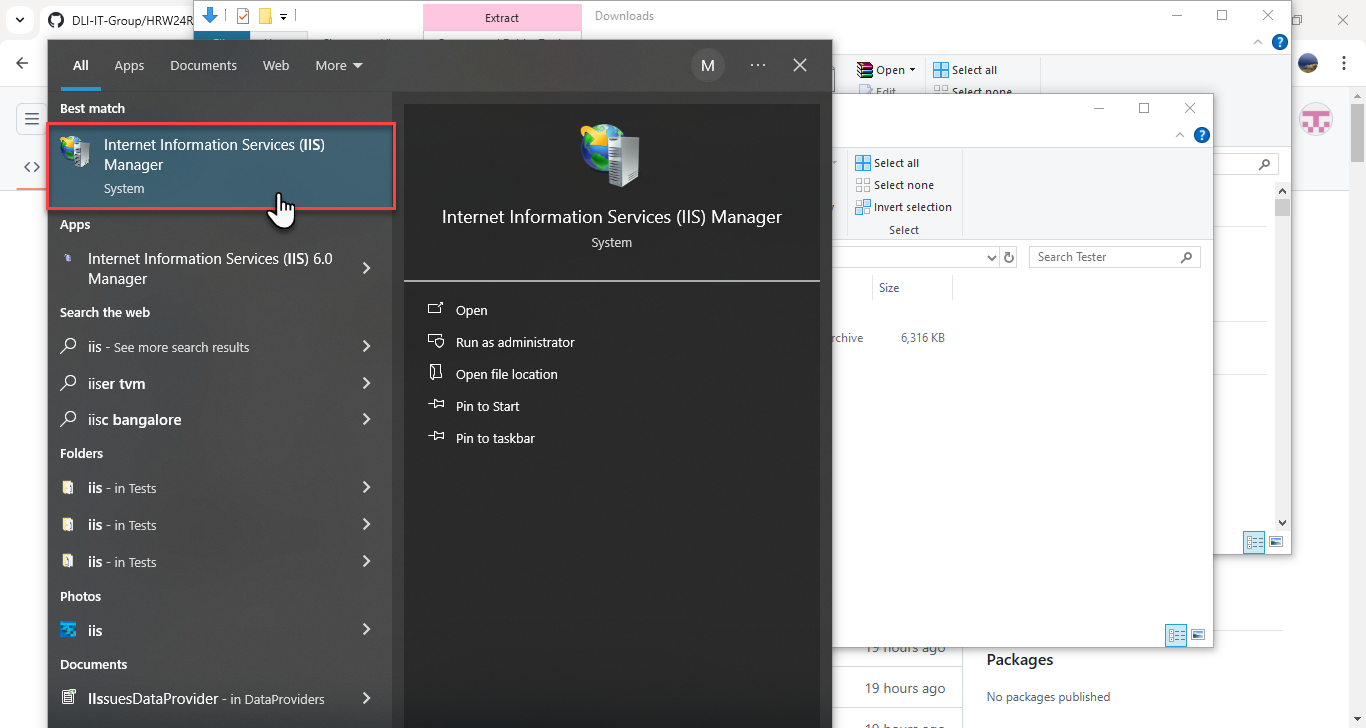
- Open IIS in your system.
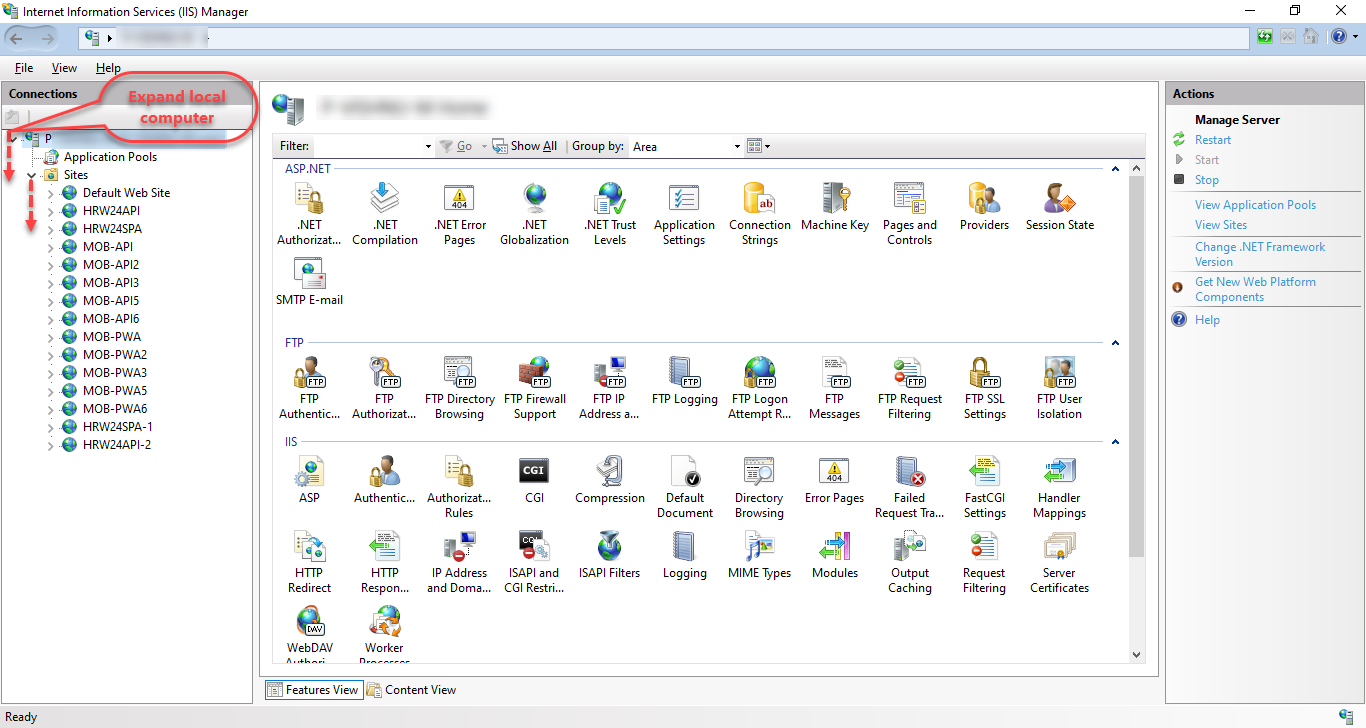
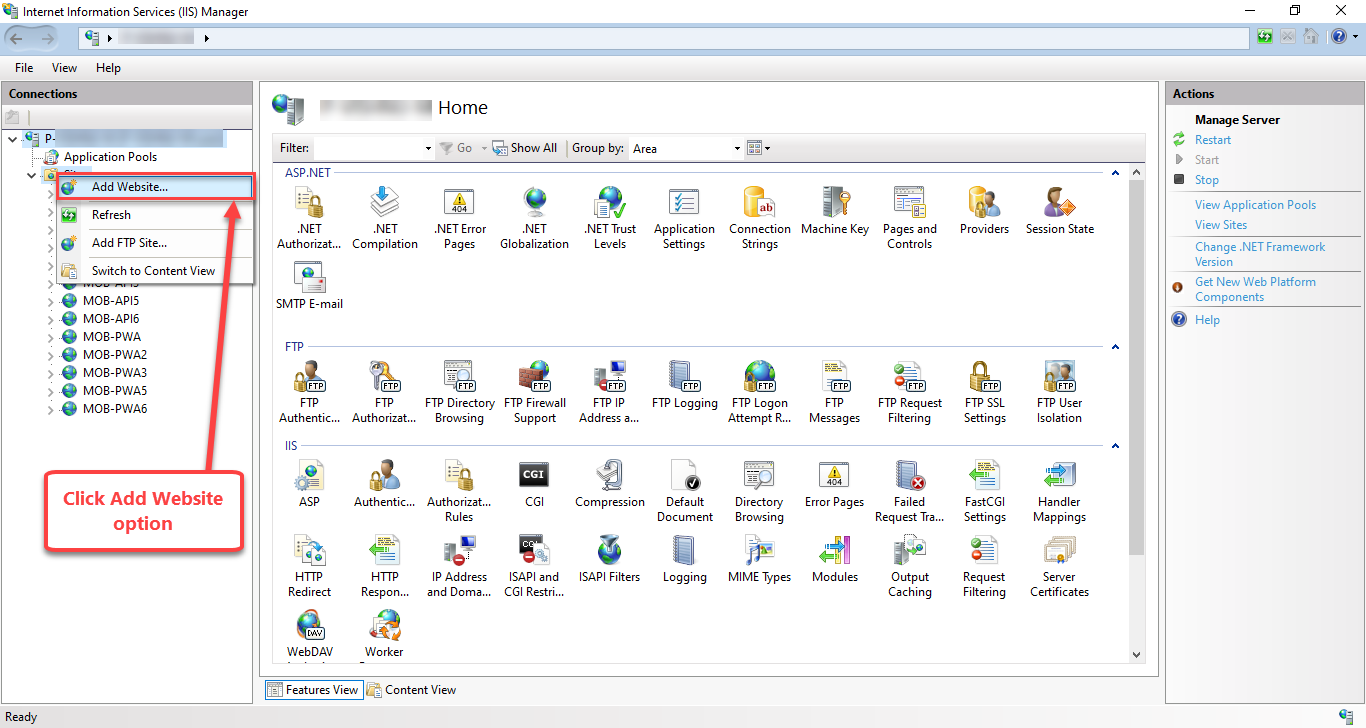
- Expand the local computer, right click on Sites, and click "Add New Site", as shown below.
- Right click Sites folder.
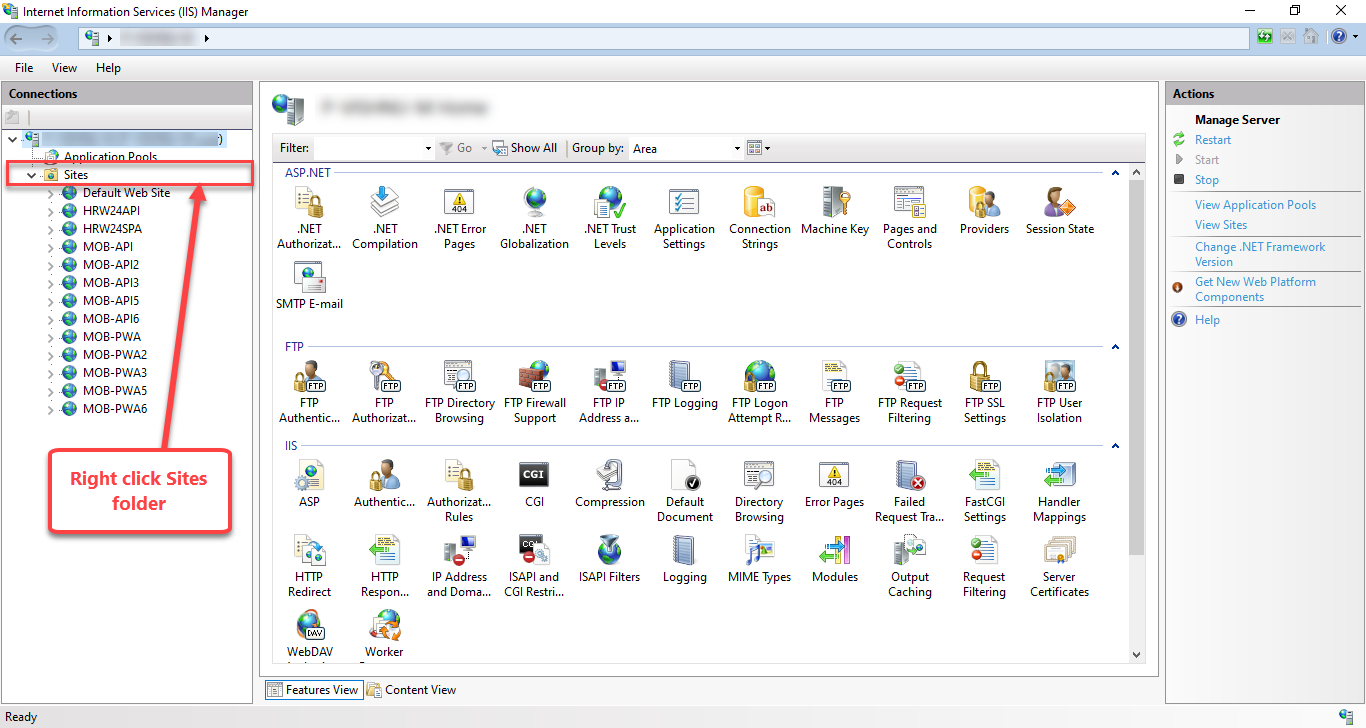
- Click on Add Website... option.
-
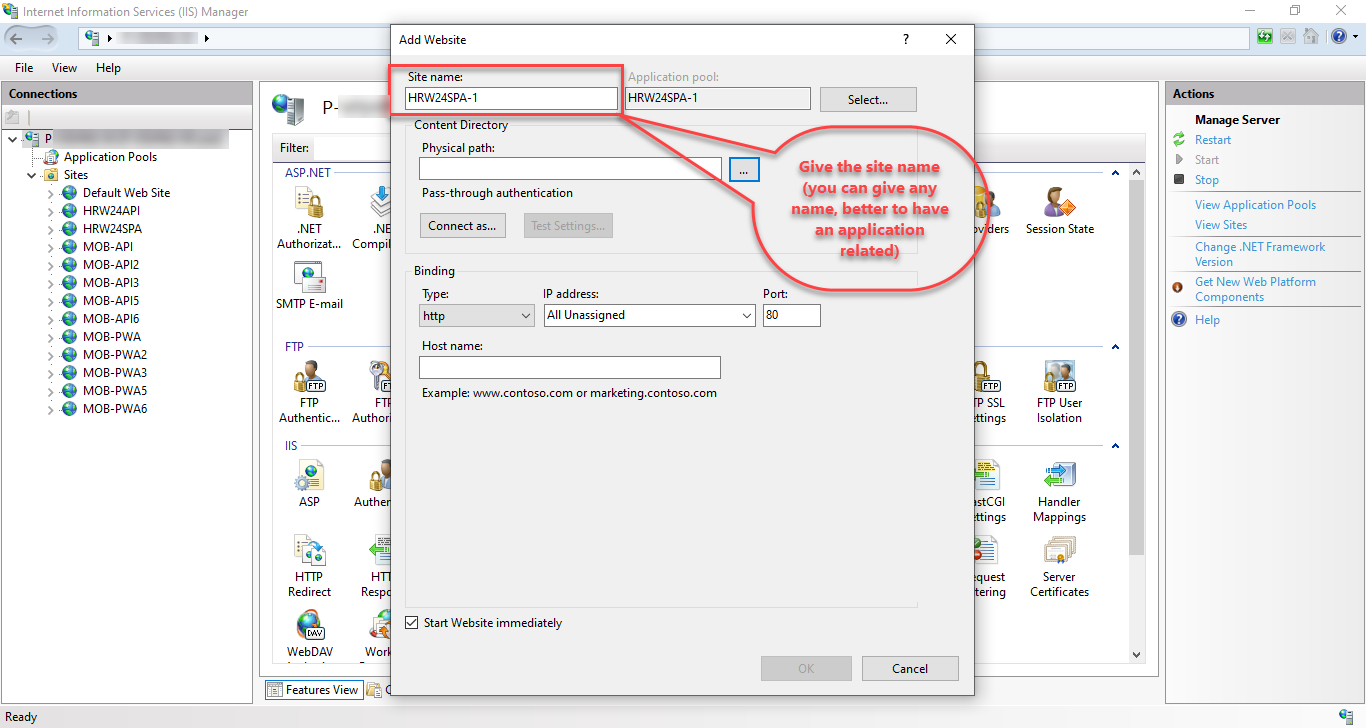
The Add Website window will open up, where give the following details:
5.1. Add the site name in the field provided.
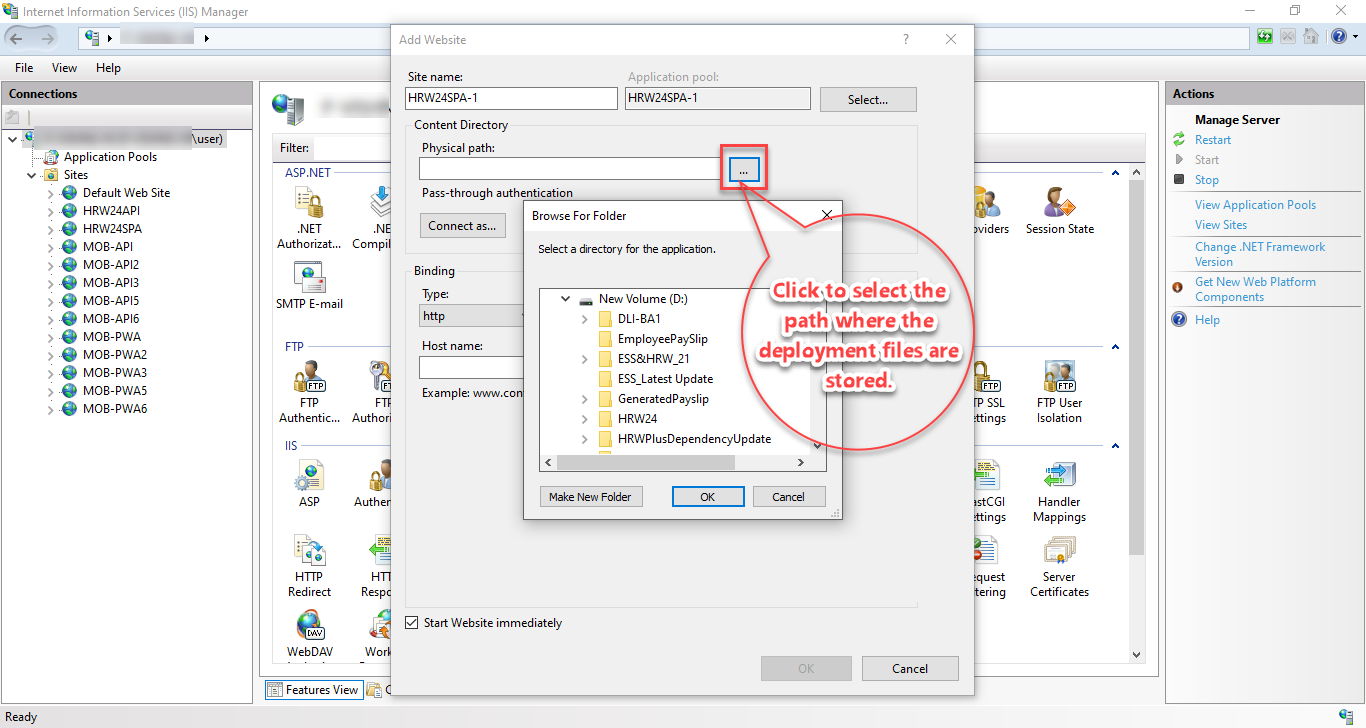
5.2. Select the Physical Path by using browse to the specific folder.
5.3. Add the port number in the textbox, Ensure the availability (i.e. give a port number that should not be used before).
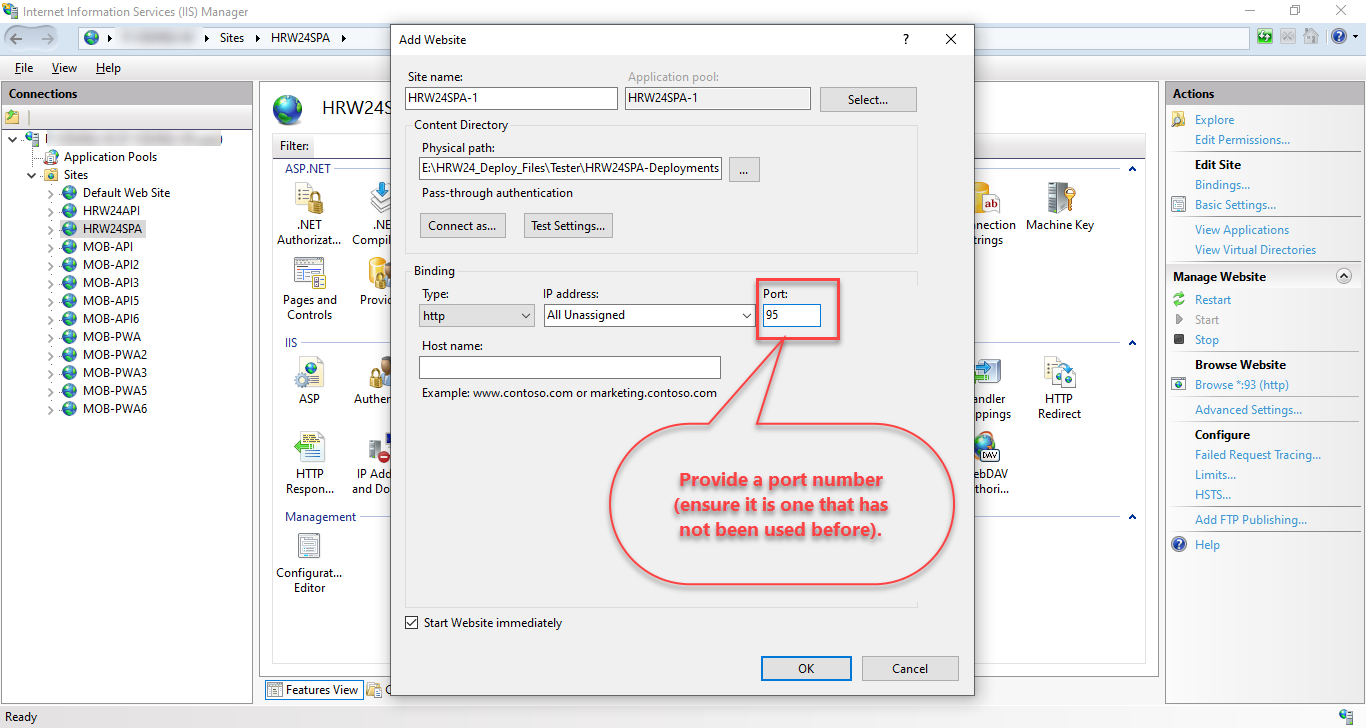
5.4 Finally click OK.
Step 3. Editing Configuration Files
-
Right click on the HRW24RESTfulAPI site and click Explore.
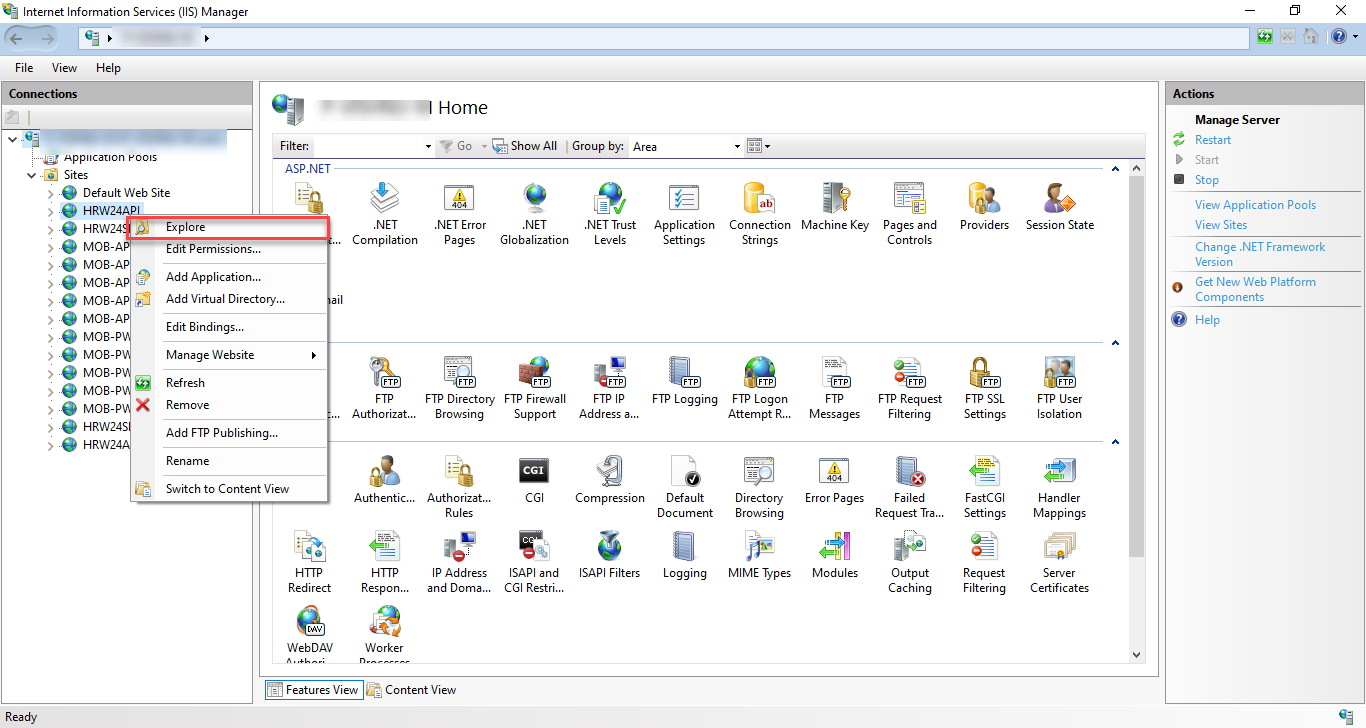
-
The related folder will open up.
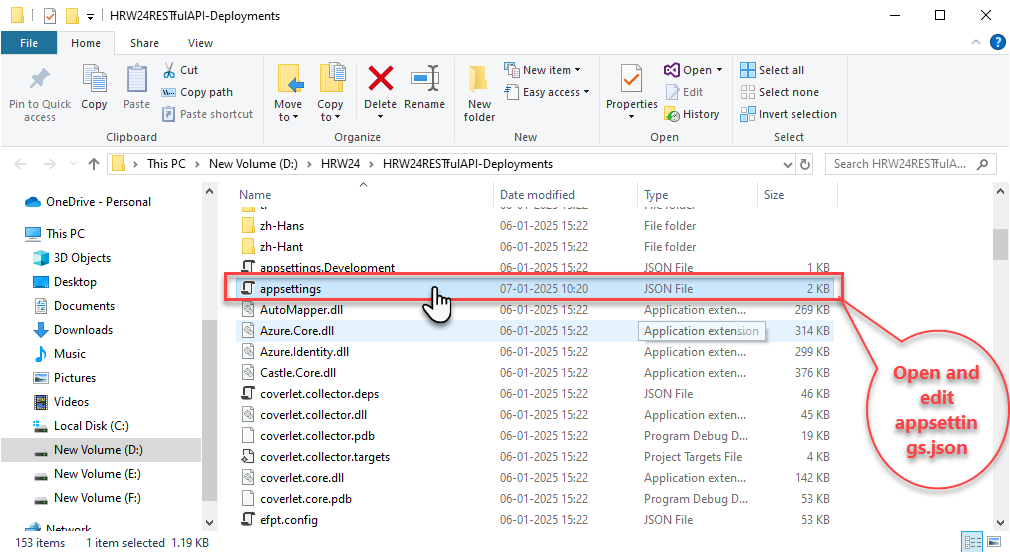
-
Open appsettings.json file and edit the following fields:
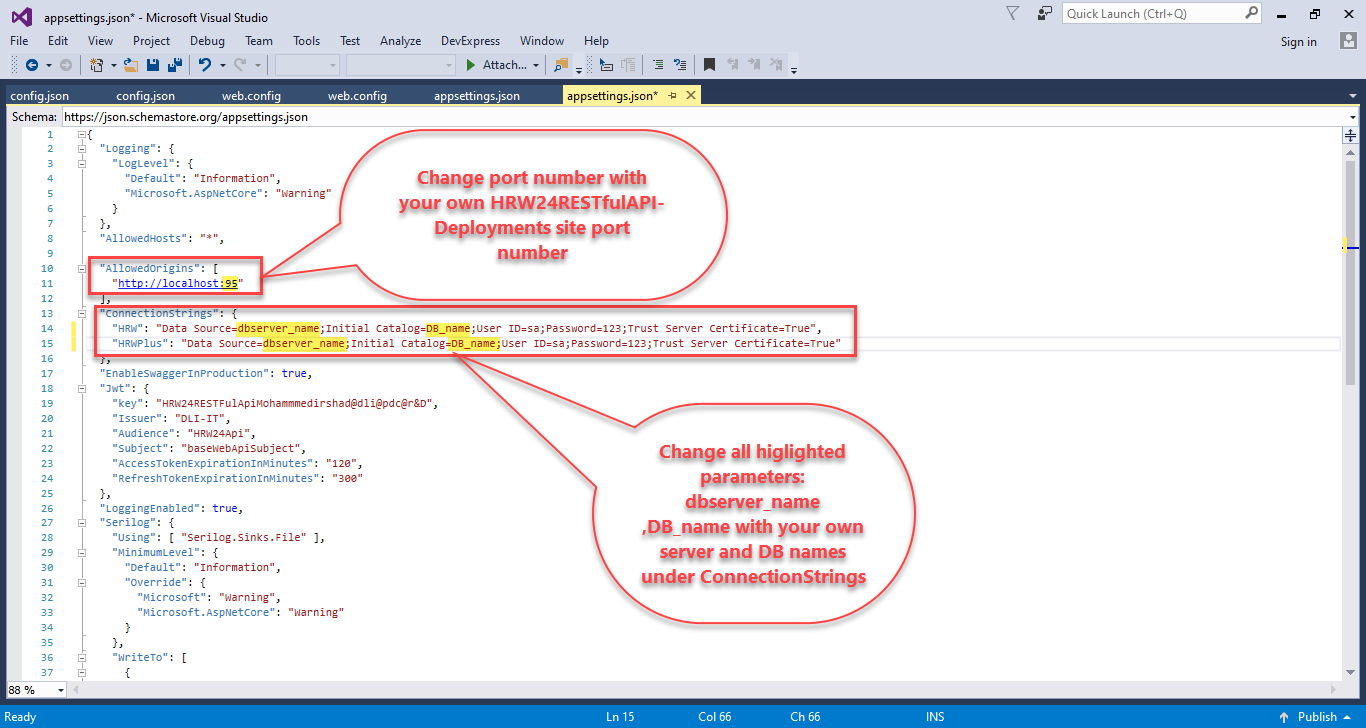
3.1. Edit the port number by giving your own HRW24RESTfulAPI-Deployments site port number (find it by clicking on HRW24RESTfulAPI-Deployments site under Sites under Connections in IIS )
3.2. Change the dbserver_name ,DB_name with your own server and DB names under ConnectionStrings for both the HRW and HRWPlus.
Note
While editing the Connection String in the config file, ensure that you add double backslashes between the dbserver_name.

3.3. Save the changes.
-
Open the Web.config file from the same folder, and do the following changes:
4.1. Add the below given part under
<handlers><remove name="WebDAV" />4.2. Add the following part, as shown in the figure.
    <modules>
        <remove name="WebDAVModule" />
    </modules>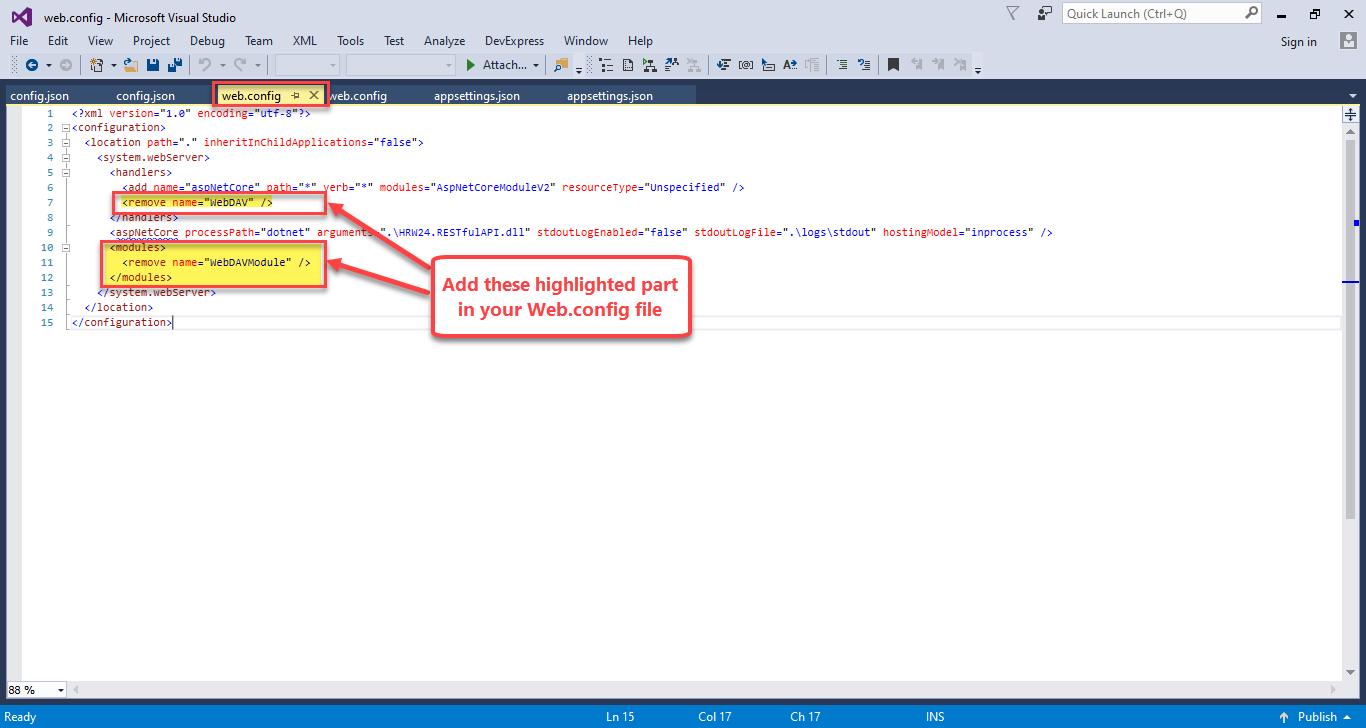
-
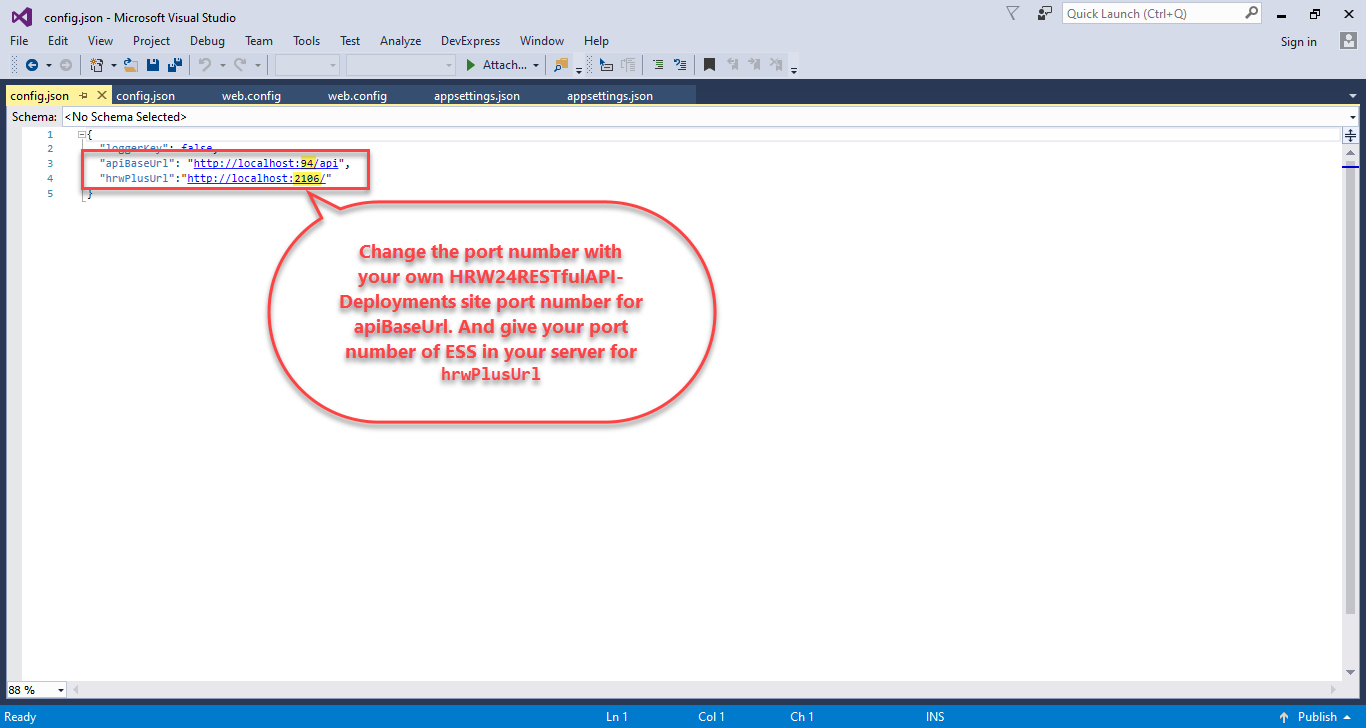
Right click on SPA related site and click Explore option. From the folder that opens, find the config.json file and open it to edit the following fields.
5.1. Edit the URL corresponds to apiBaseUrl by changing the local host port number with your own HRW24RESTfulAPI-Deployments site port number. (Also change the https in URL to http)
5.2. Edit the hrwPlusUrl part by updating the port number in its corresponding URL to match the one used by ESS running on your local system.
Step 4. HRWPlus (ESS) Integration
Do the following steps to view the integrated ESS view in HRW24:
-
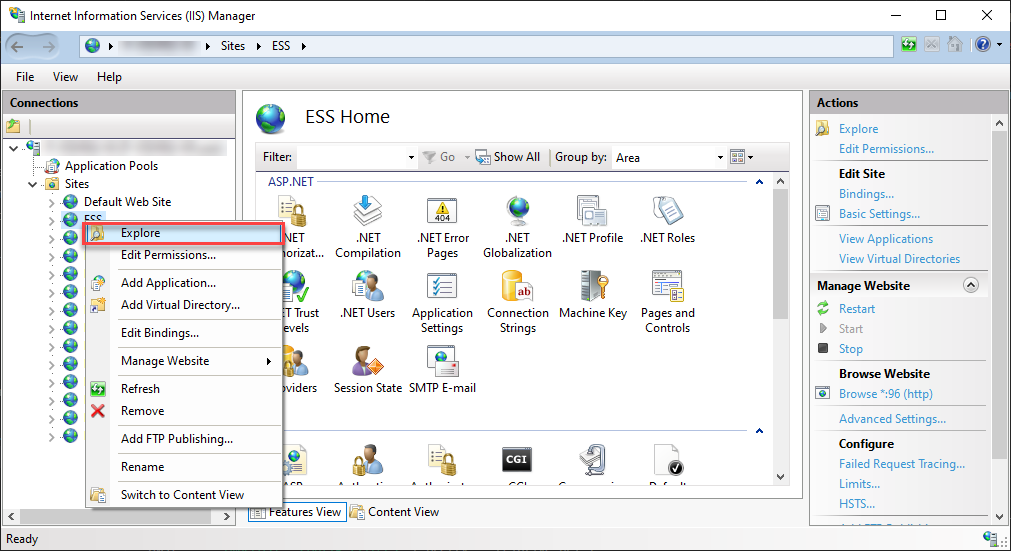
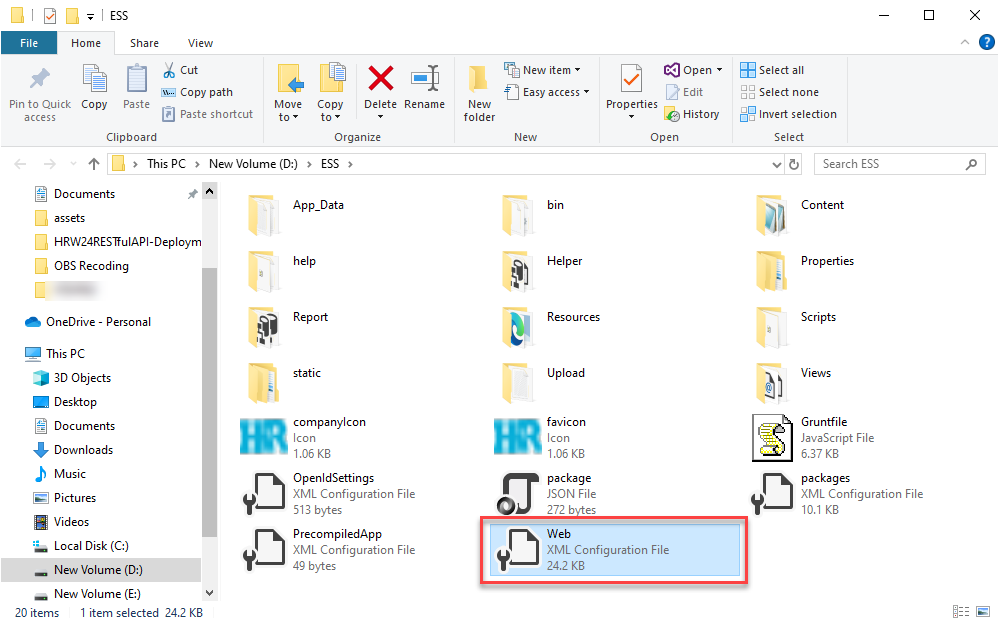
Open the directory where the ESS files are located - Do it either through System Explorer or using Explore option in IIS
-
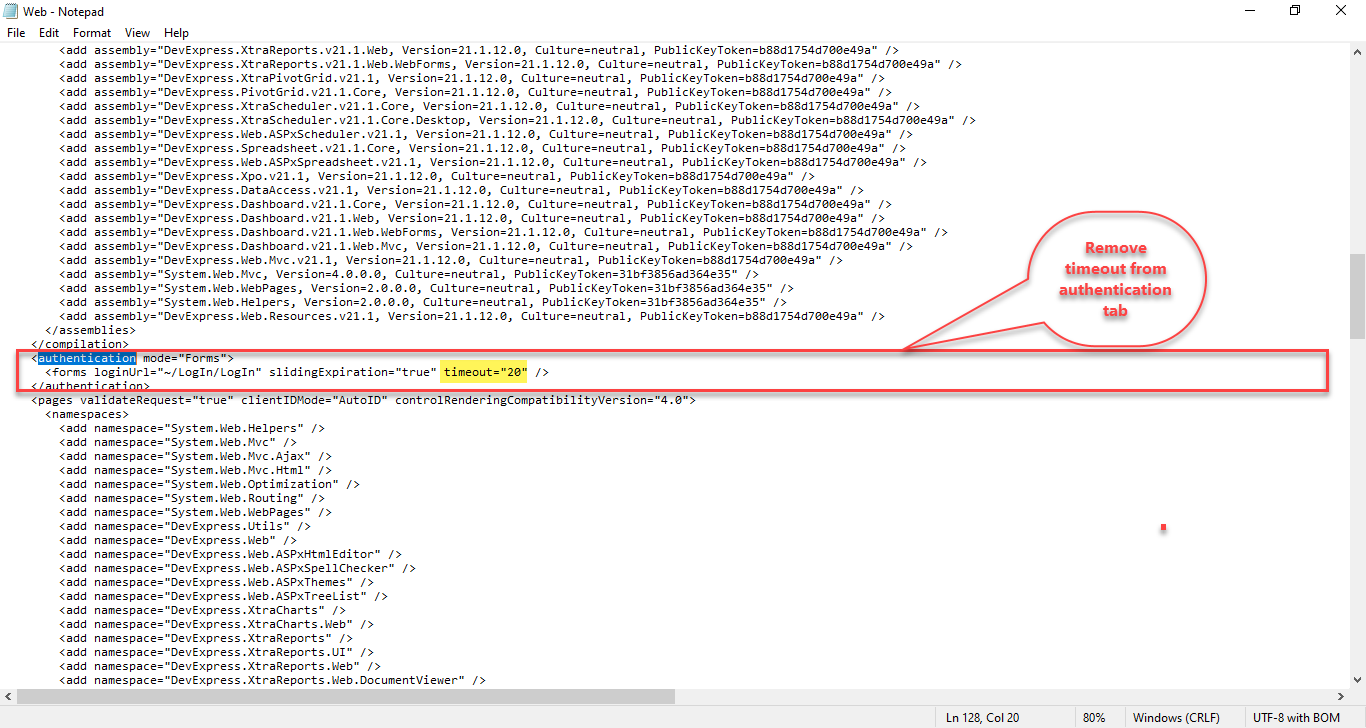
Open the Web.config file in any editor.
-
Change the following parts:
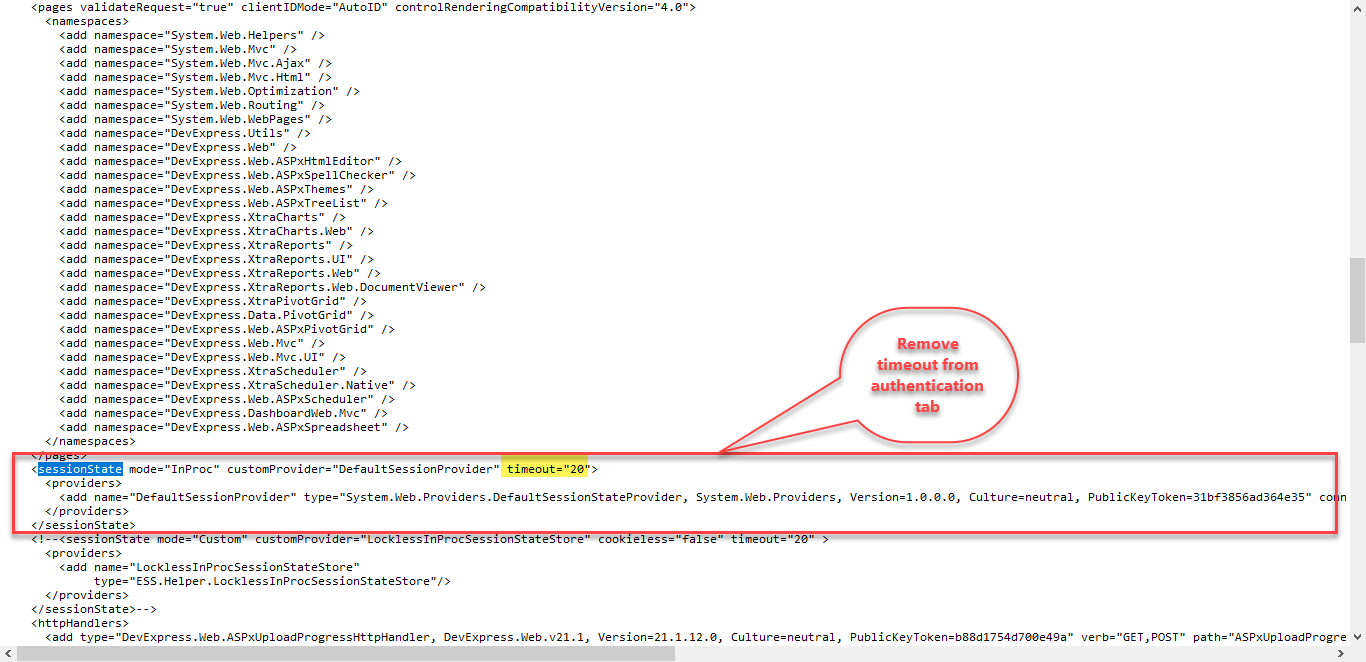
3.1. Remove the timeout part in the authentication and from the sessionState tags.
3.2. Replace the code part inside customHeaders tag under httpProtocol tag.
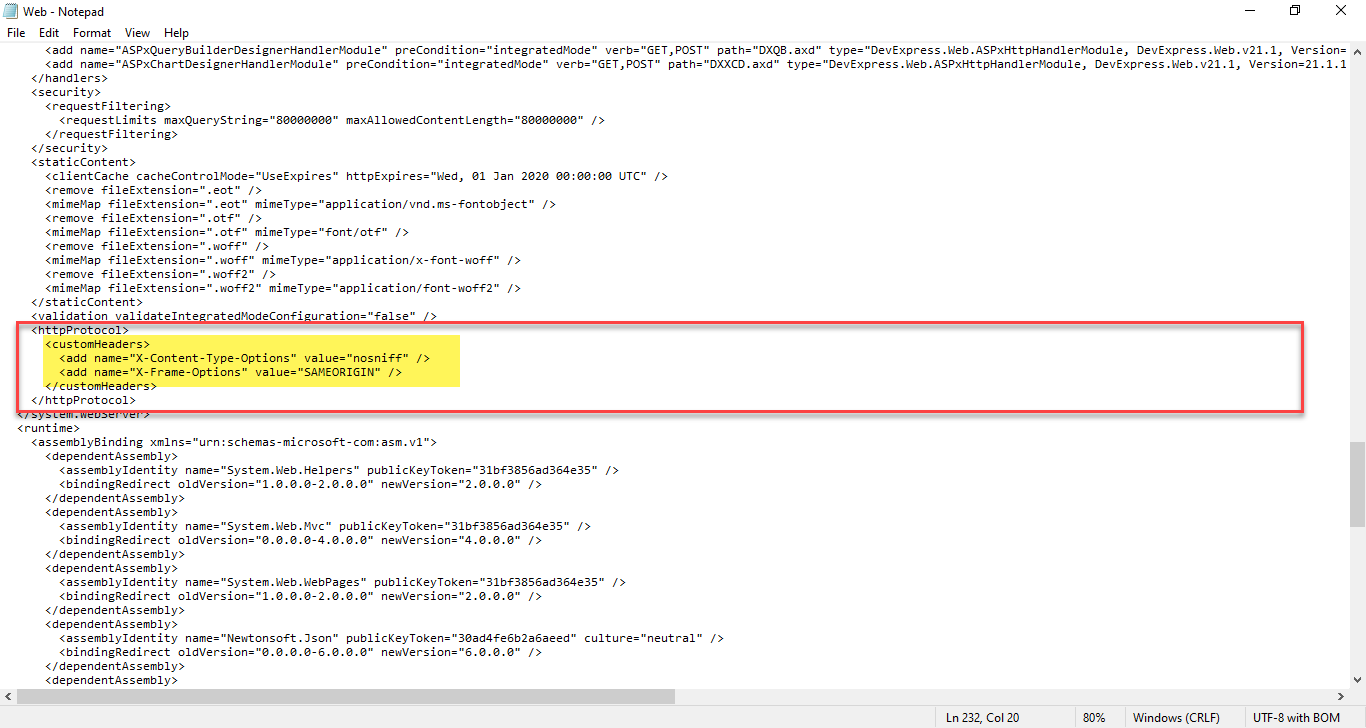
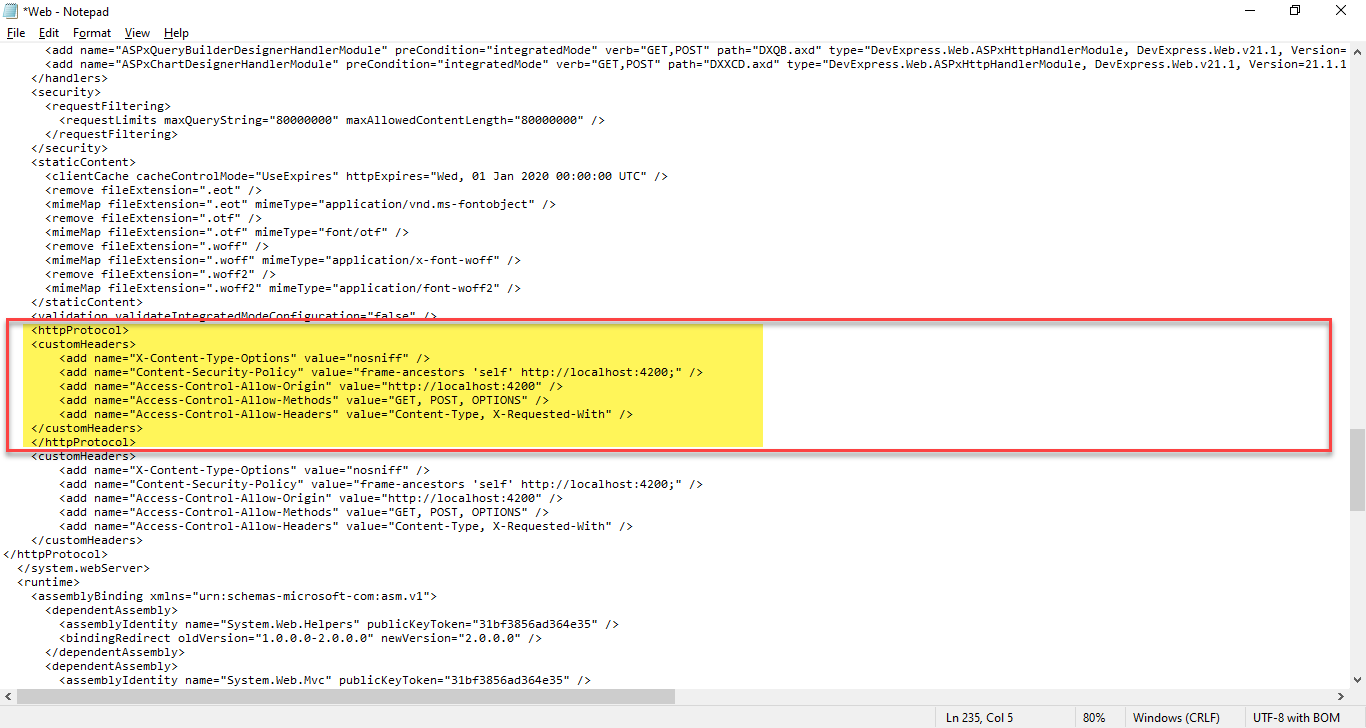
Replace with the following lines of code.
<httpProtocol> <customHeaders> <add name="X-Content-Type-Options" value="nosniff" /> <add name="Content-Security-Policy" value="frame-ancestors 'self' http://localhost:4200;" /> <add name="Access-Control-Allow-Origin" value="http://localhost:4200" /> <add name="Access-Control-Allow-Methods" value="GET, POST, OPTIONS" /> <add name="Access-Control-Allow-Headers" value="Content-Type, X-Requested-With" /> </customHeaders> </httpProtocol> -
After finish editing, Save the Web.config file.
-
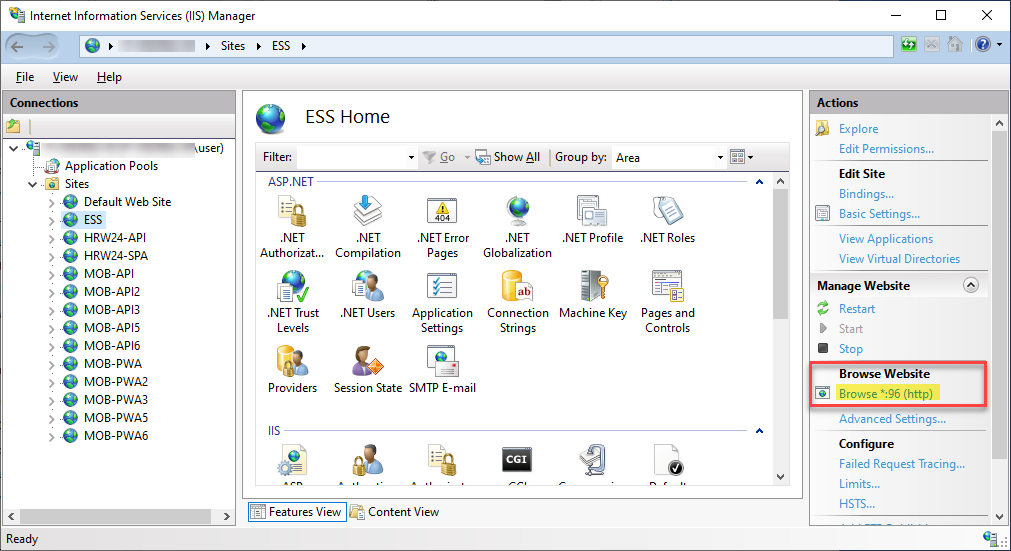
Run the HRWorks Plus using Browse option under Browse Website under Actions dialog.