Dashboard Creation
This section guides you through configuring your dashboard and creating widgets to suit your specific needs.
Steps to Create a New Dashboard:
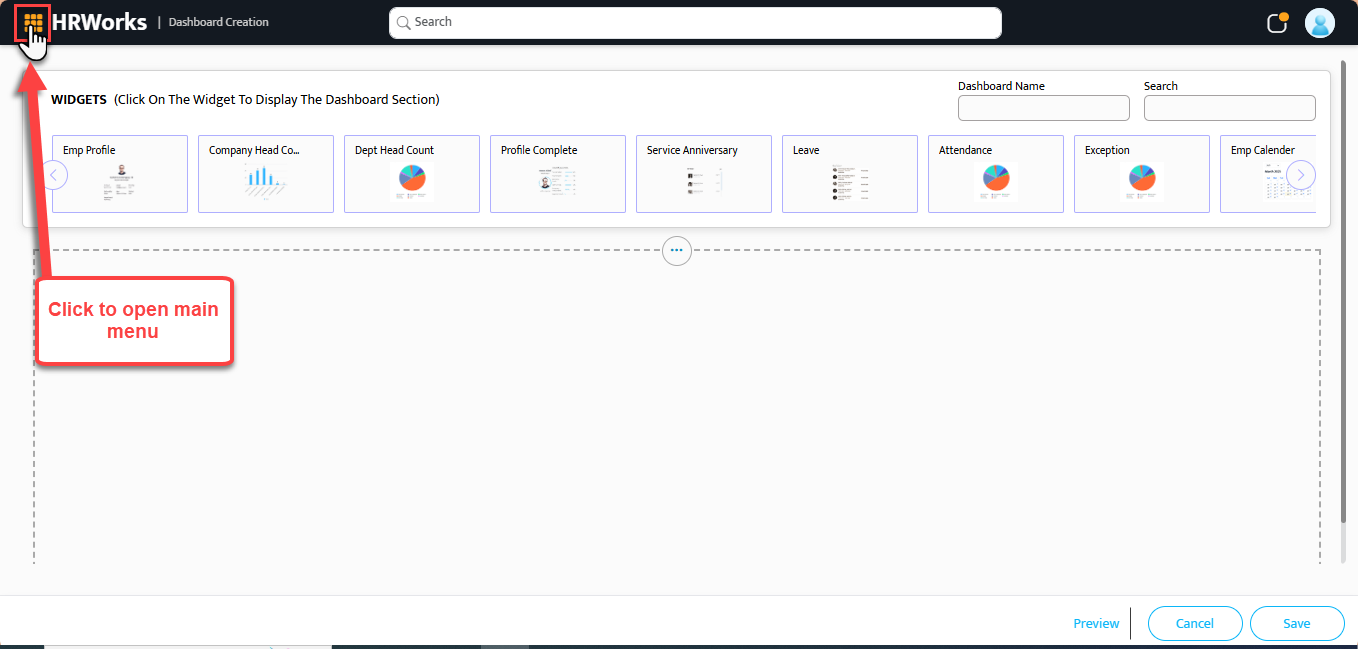
- Click on the menu button in home page to view the menu
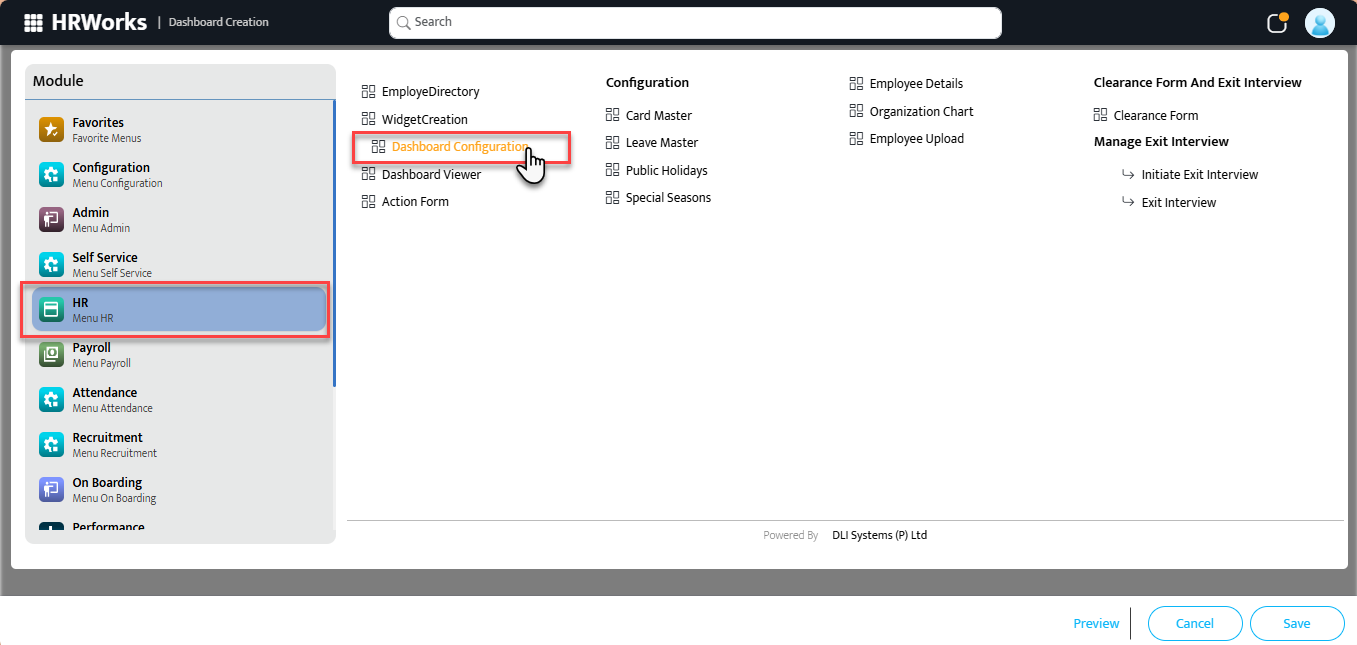
 2. From the menu popup, hover over the HR Portal.
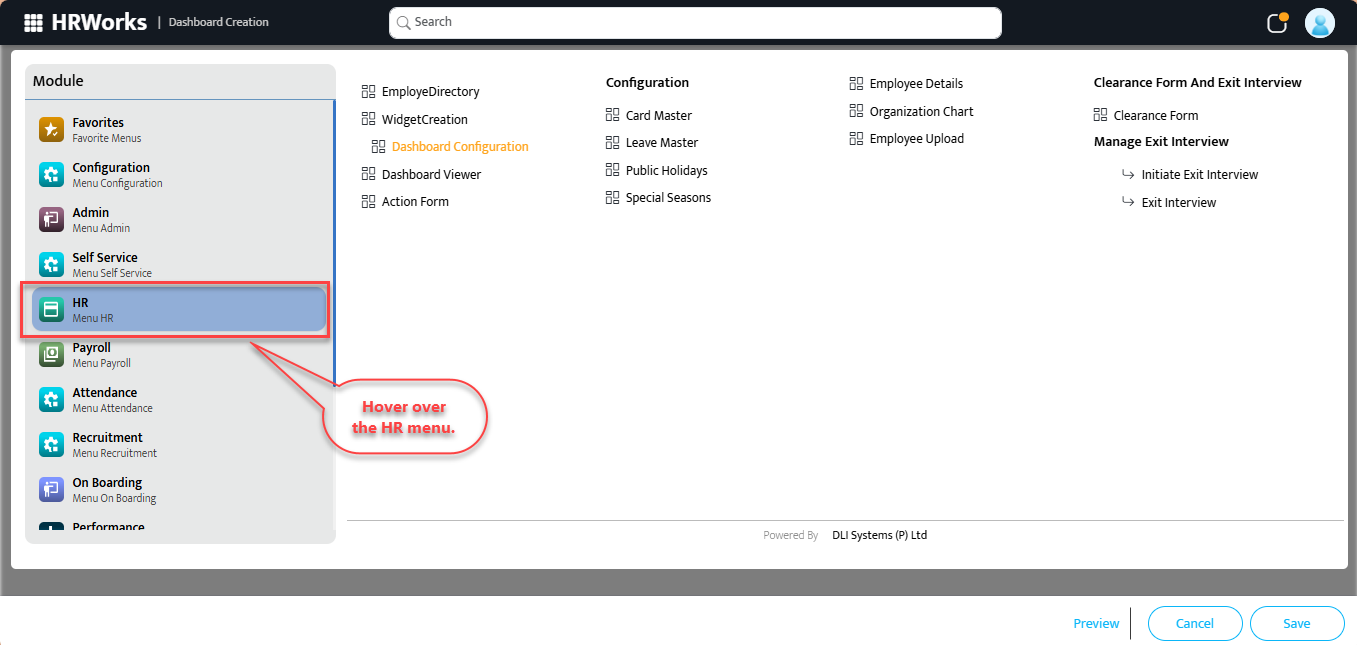 3. Click on the HRW24 Dashboard Configuration menu.
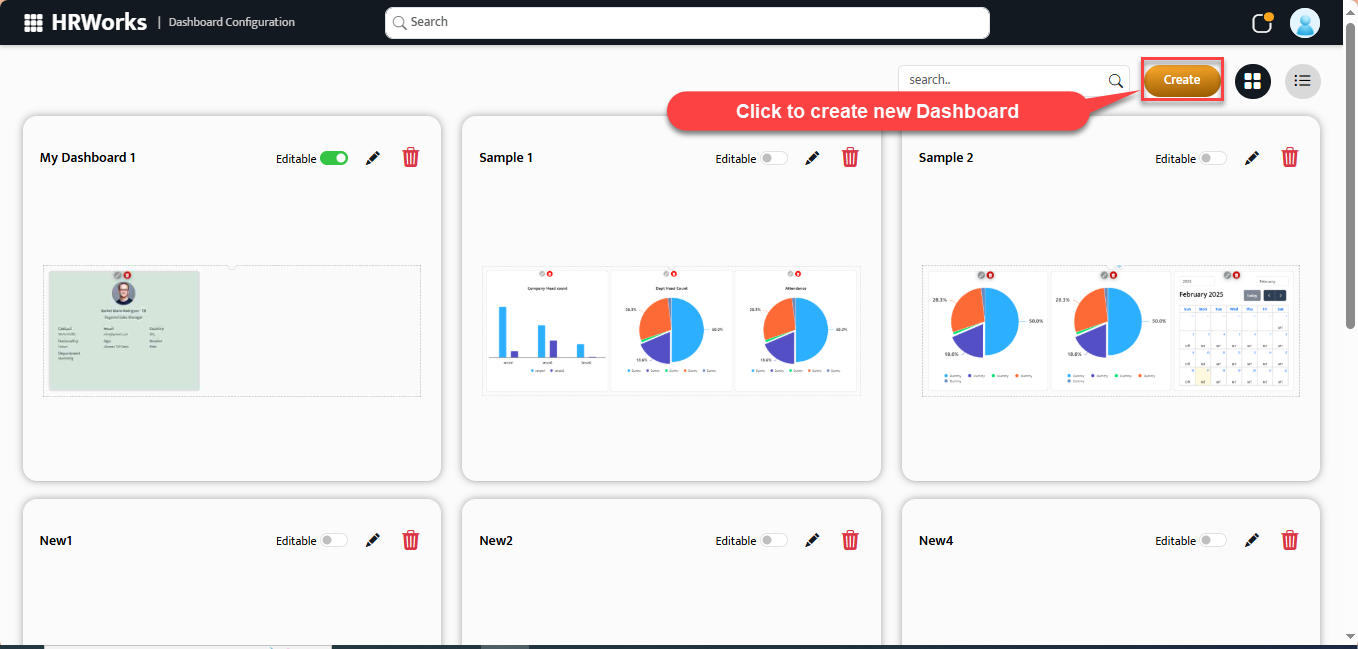
 4. Click on the Create button, the Create New Dashboard page will open up.
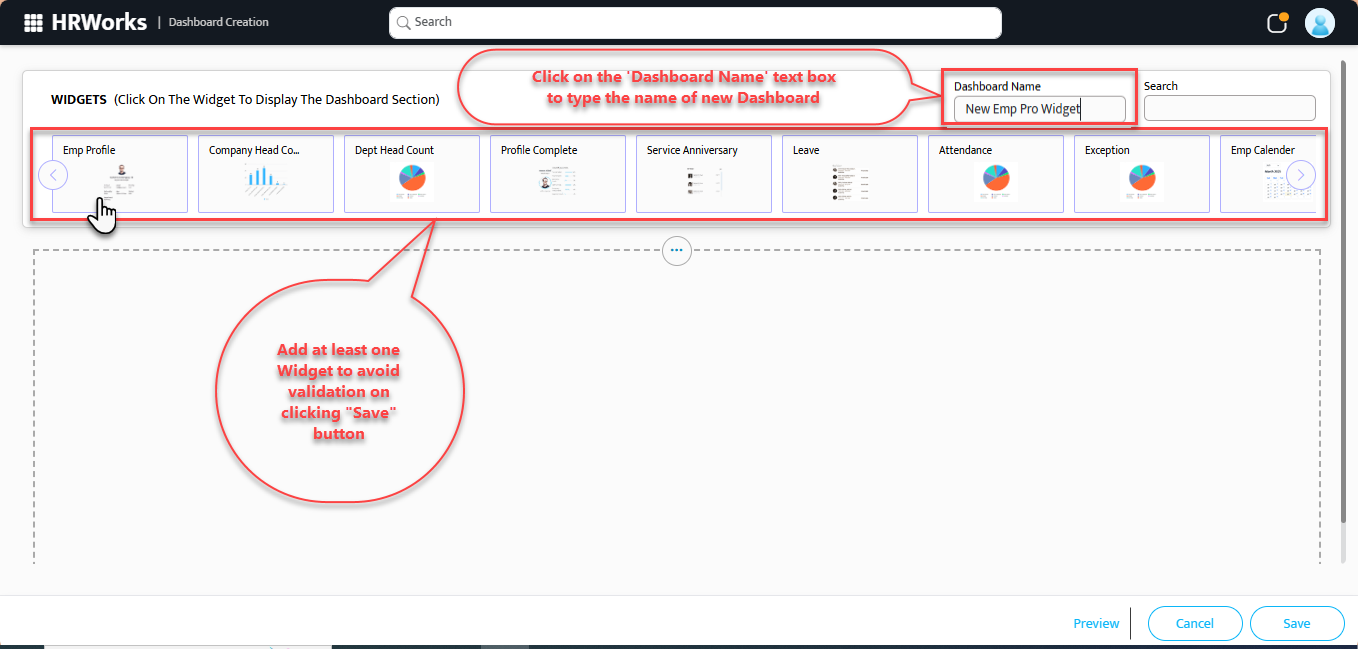
 5. Type the name for your Dashboard in the Dashboard Name text field. And add any Widget by selecting the required type from the Widget Palette provided above.
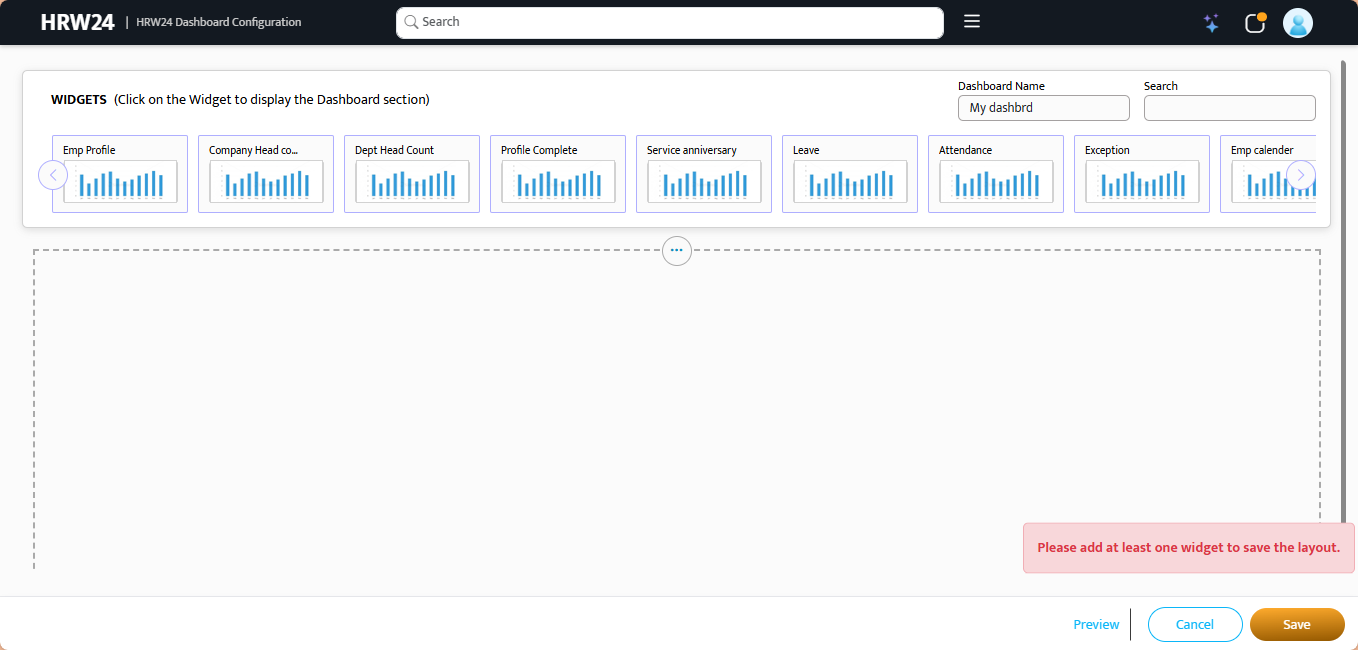
Keep in mind
 At least one widget should be added when creating a new dashboard; otherwise, the following validation will be shown.
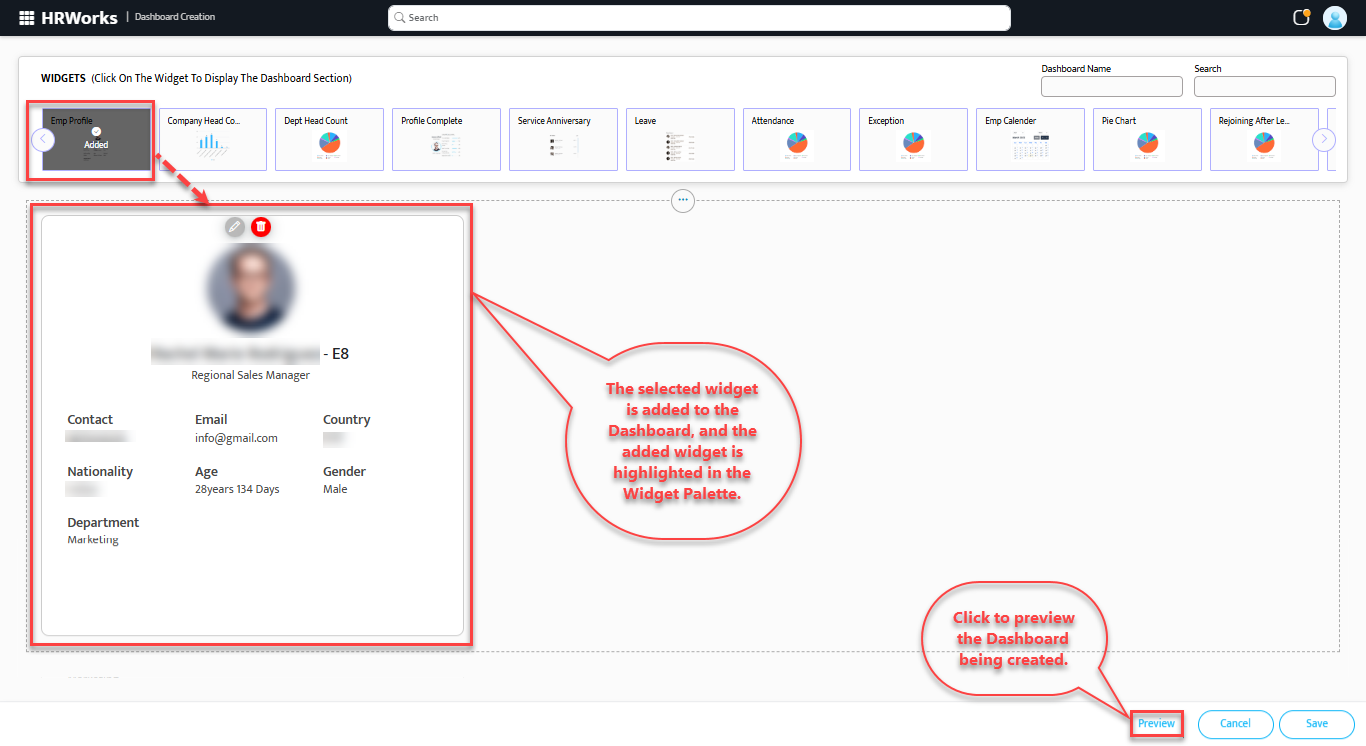
 6. The selected widget is added to the Dashboard, and the added widget is highlighted in the Widget Palette.
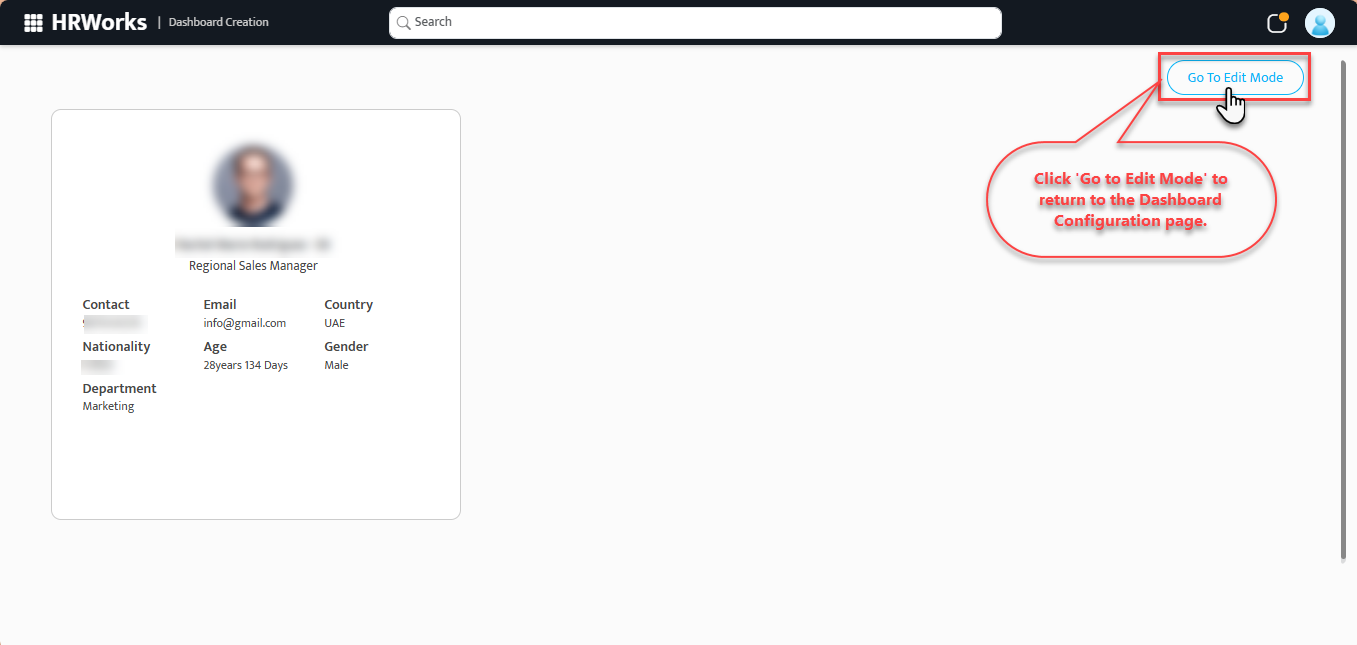
6.1. Click the Preview option to view the edited part and verify how it will look after creation.
6.2. To return back to configuration page, click on Go to Edit Mode option above.
Note
You can edit the Widget during the preview mode also. For that use the Edit button  at the top of the widget.
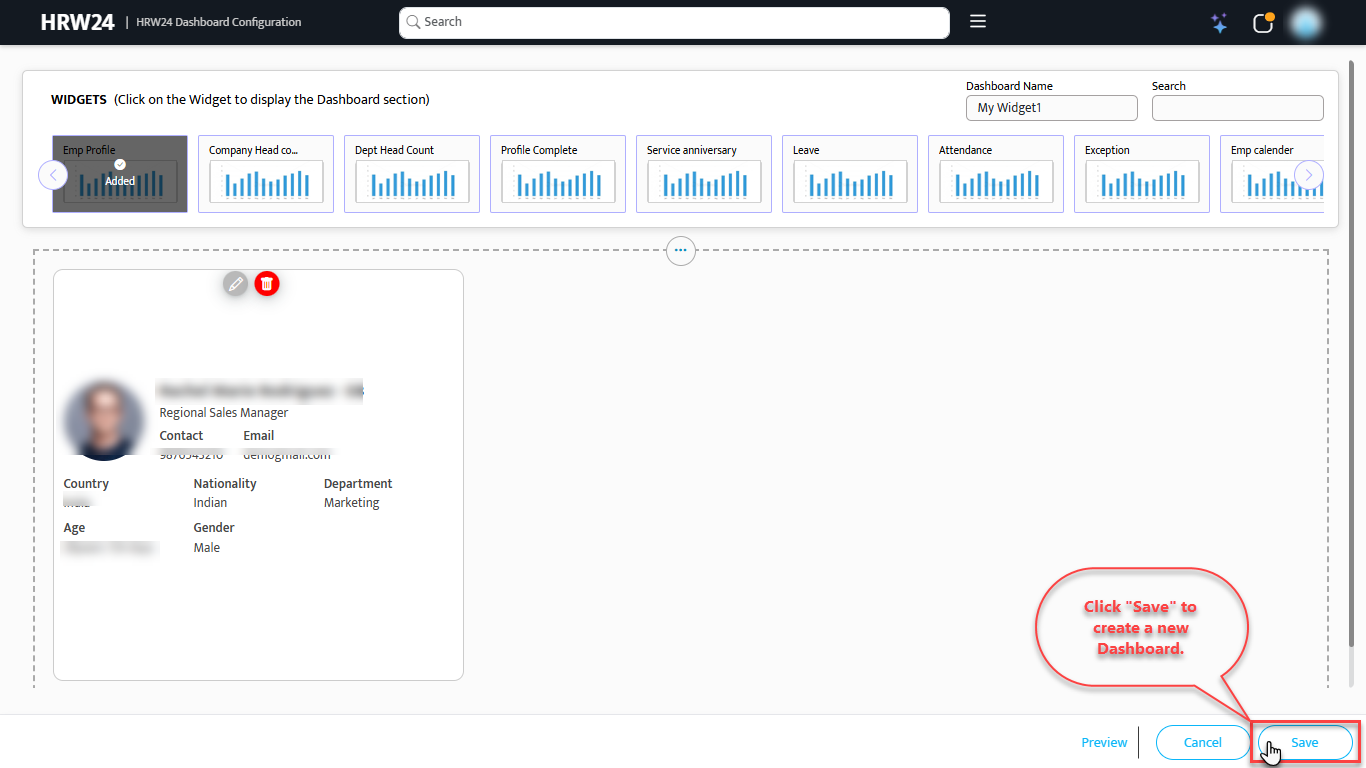
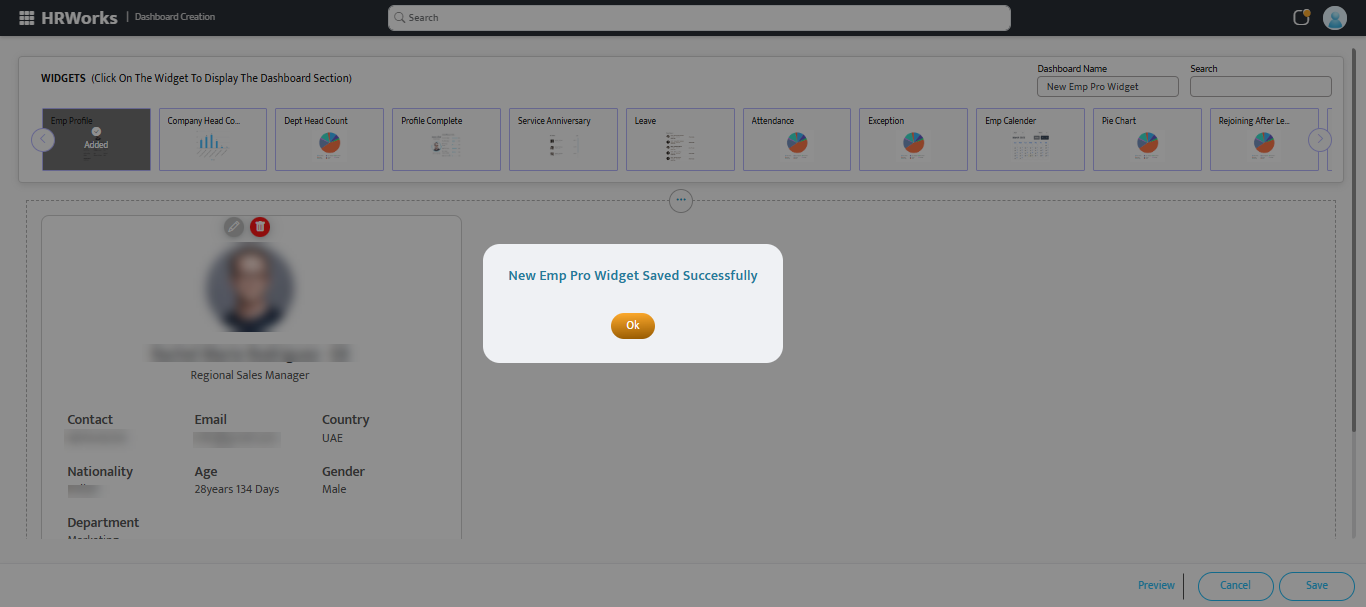
- Save the Dashboard after adding the required changes.