SSO Configuration
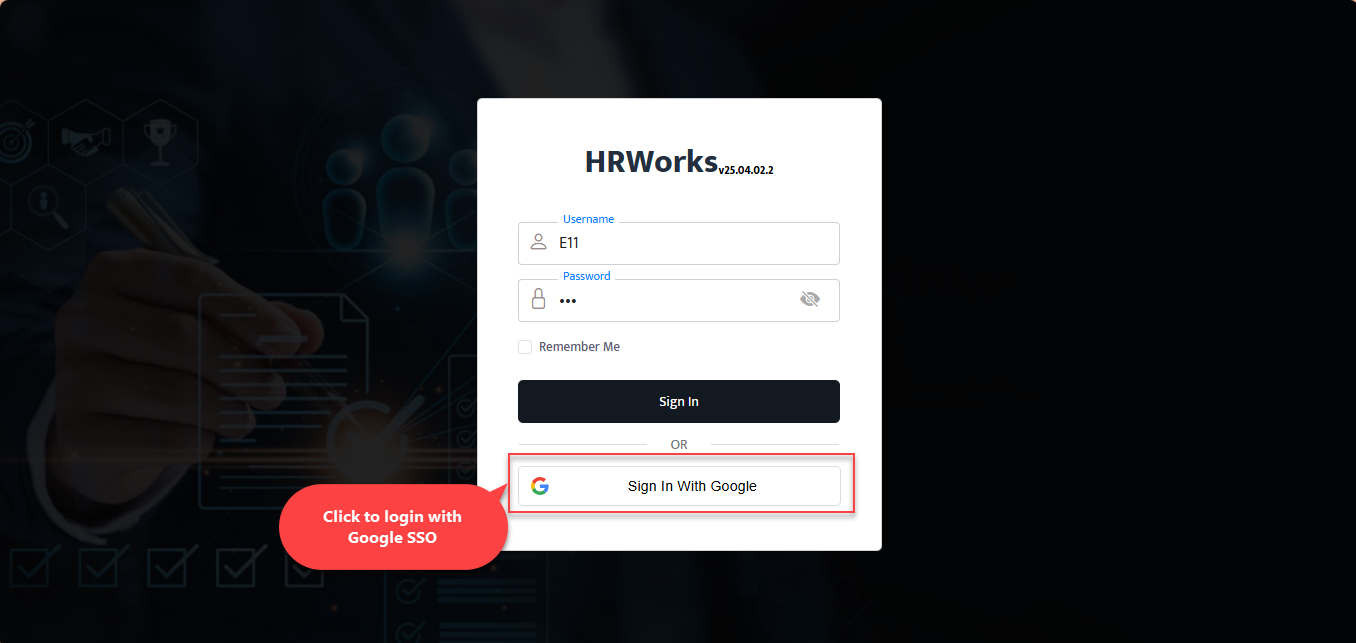
HRW24 offers the option of SSO sign-in, in addition to the standard user login using credentials from other social media platforms. Users can log - in using their Google, Microsoft or Azure account credentials. This option becomes available on the login page only after setting up the SSO in the configuration page under the Configuration menu. The SSO settings are configured by admin, after completing the setup of the related configurations like Google + API config for Google SSO enabling. The following section describes how to configure SSO options in HRW24.
Steps to Configure SSO
Add New SSO Configuration
Follow the steps below to configure the SSO options:
-
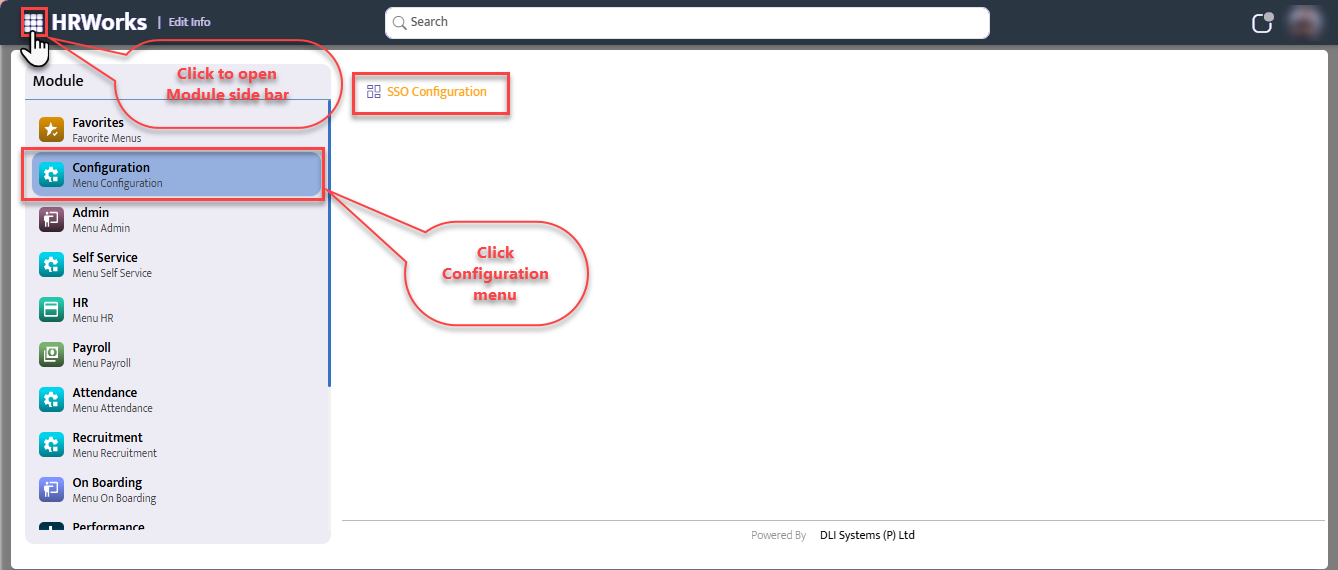
Open the SSO Configuration page from the Configuration menu under the main menu pop up.
-
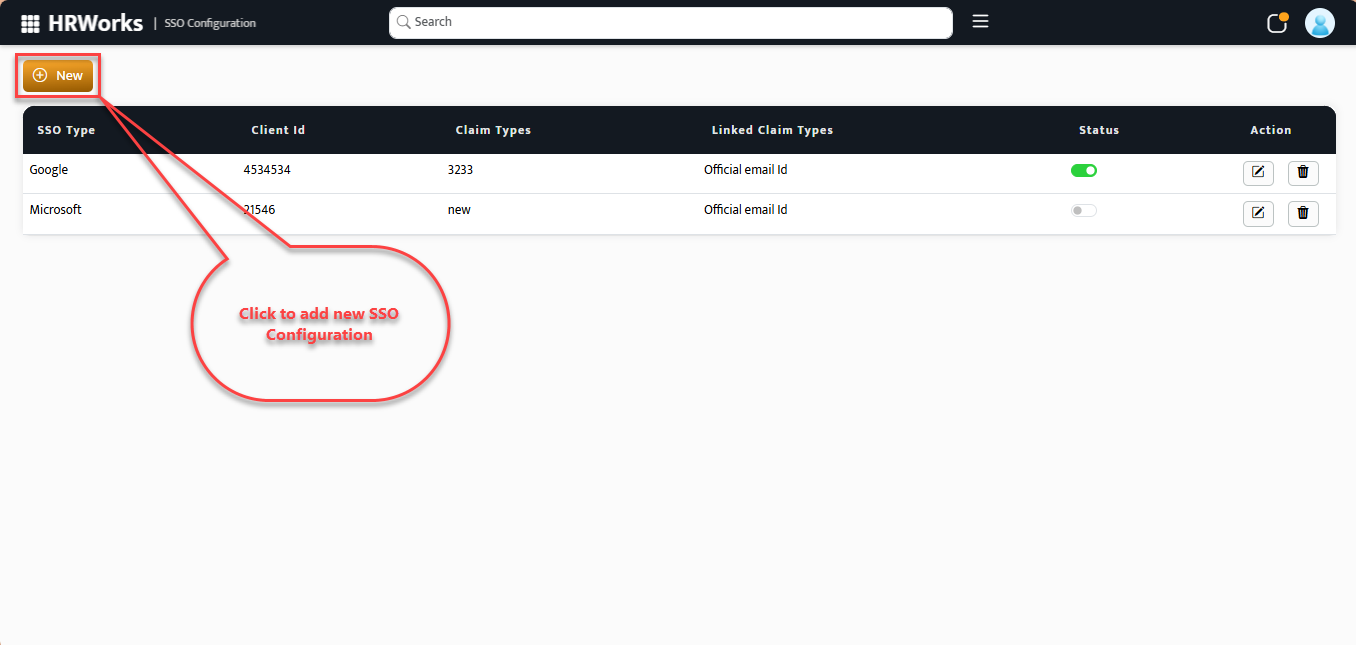
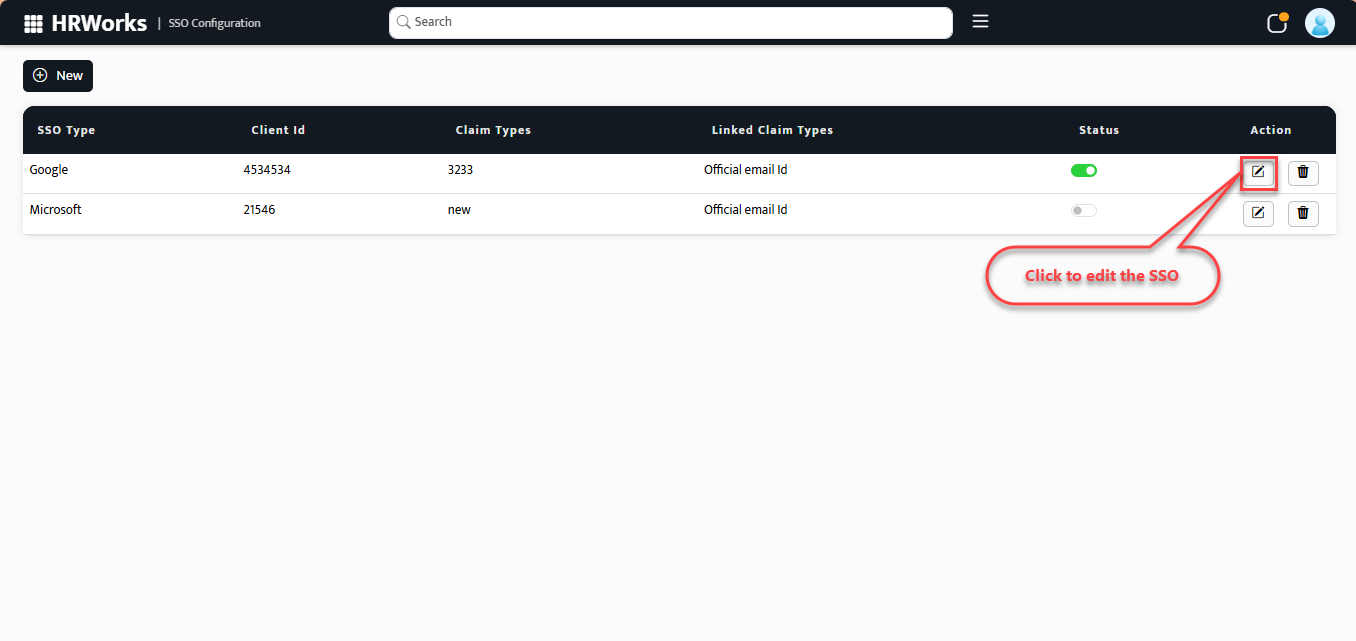
The already added configuration will be available under the list in the grid.
-
Click the New button on the top left of the page to add new SSO Configuration.

-
On the Add New SSO Configuration pop up that opens up, provide the details in the following fields:
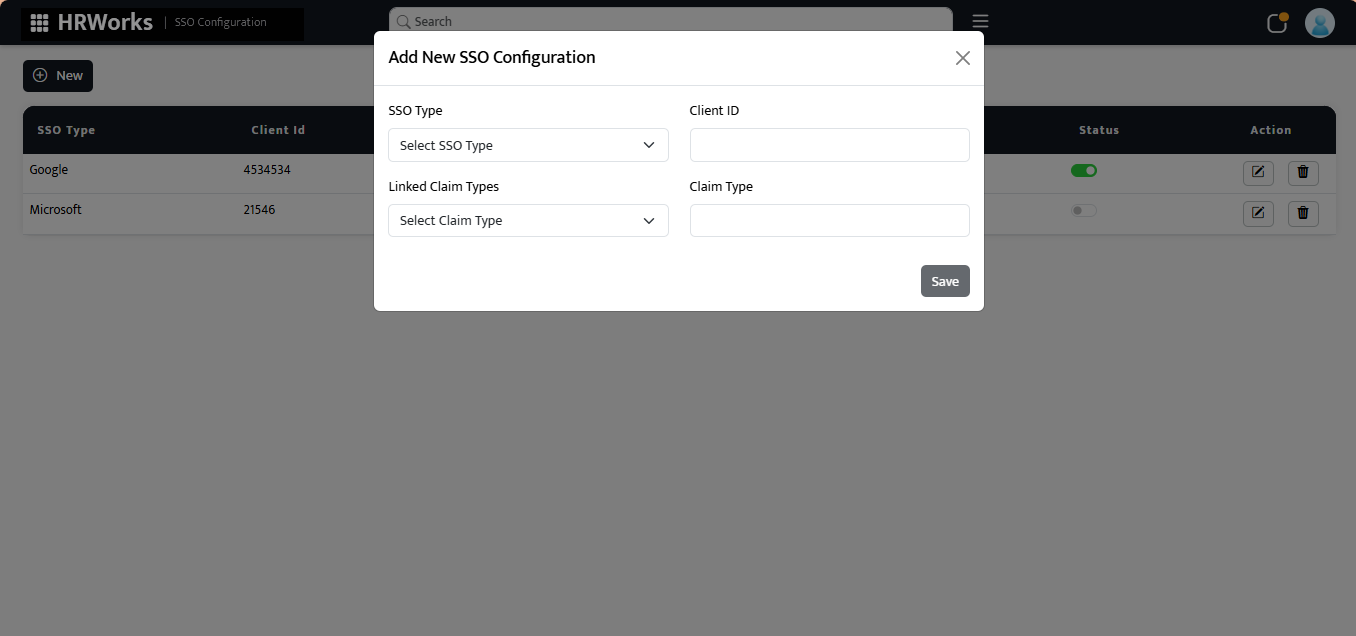
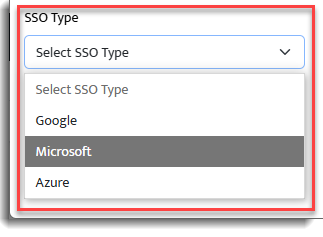
4.1. SSO Type:Select which type of SSO is planned to be added.
4.2. Client ID:Provide the Client ID in the text field.
4.3. Linked Claim Types:Select the Claim type from the drop down.
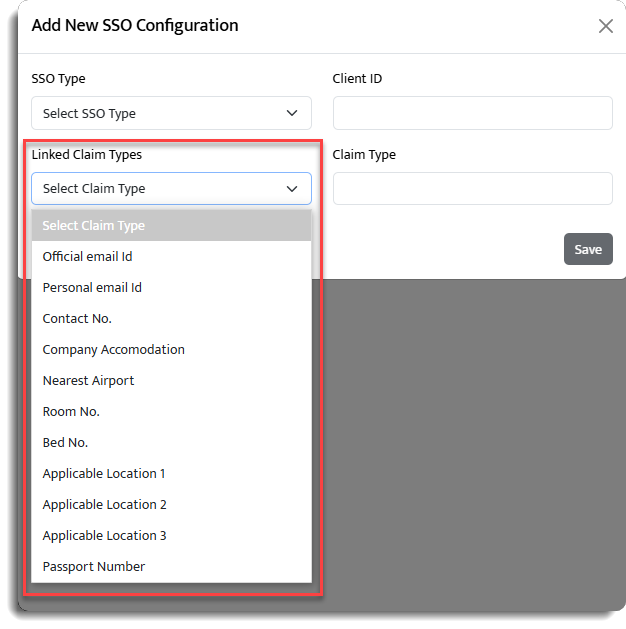
4.4. Claim Type:Describe the Claim Type in the field provided.
Edit the SSO Configuration
Steps to edit SSO Configuration
Follow the steps below to edit the SSO Configuration
-
On the SSO Configuration page, click the Edit button in the configuration list corresponding to the SSO type that needs to be edited.
-
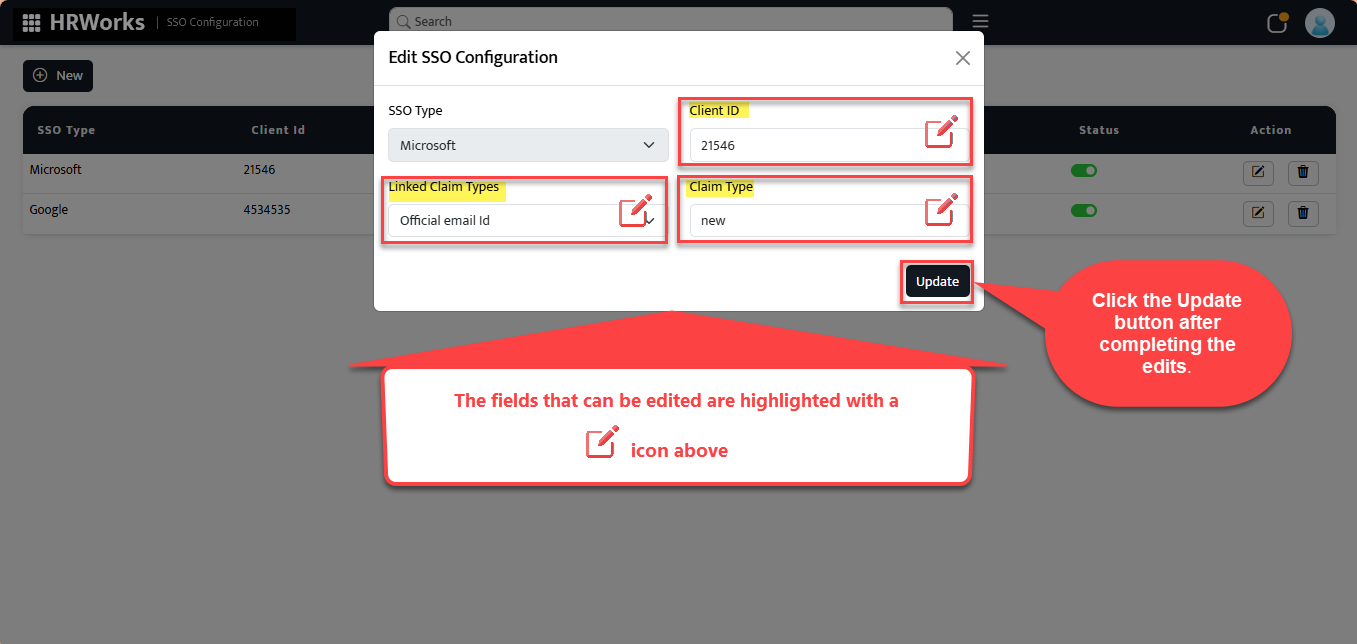
The pop up containing SSO details will open up, where edit the following fields
2.1. Client ID: Edit Client ID by clicking inside the text field.
2.2. Linked Claim Types: Choose the required Linked Claim Type from the drop down given.
2.3. Claim Type: Change the Claim Type by editing the text box under the Claim Type title.
-
Click the Update button after completing the edits.
-
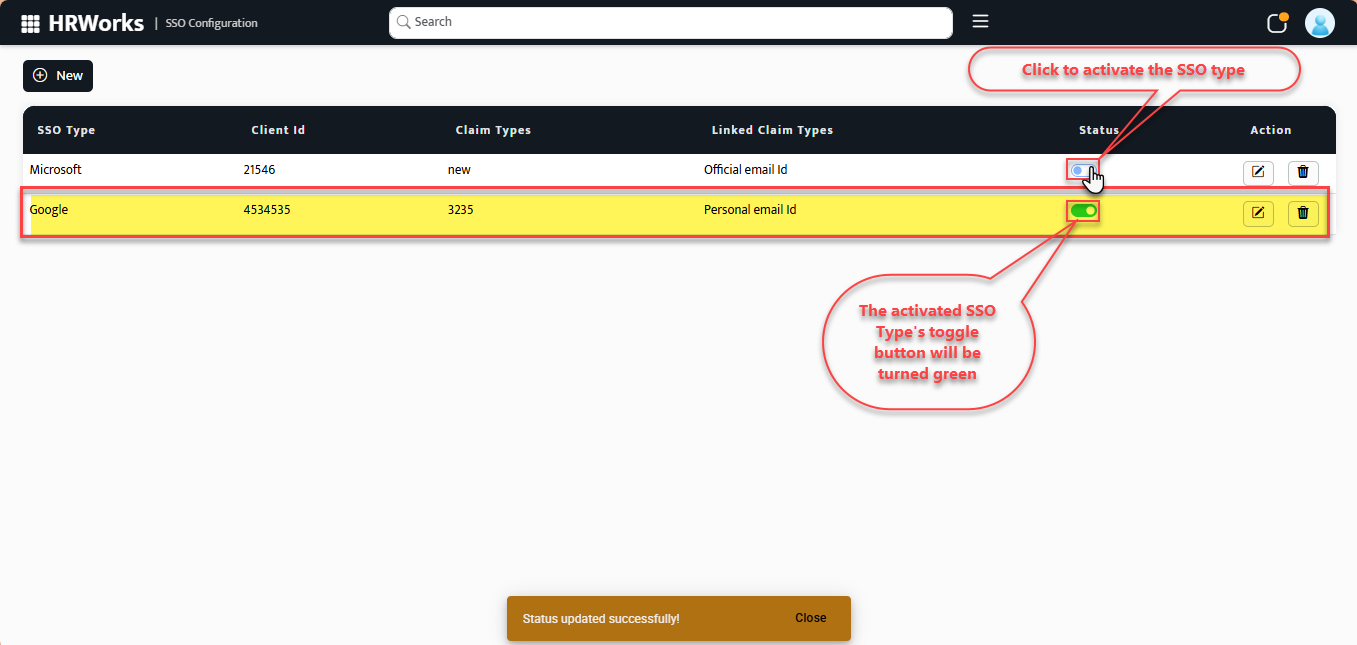
Activate the required SSO type to make the SSO login option available on the login page. To activate an SSO, click the corresponding toggle button. So the activated SSO's toggle button will turned green.
Login the account using SSO option :
After adding and activating an SSO type, the login option will appear on the start page of HRW24.